Be yourself; Everyone else is already taken.
— Oscar Wilde.
This is the first post on my new blog. I’m just getting this new blog going, so stay tuned for more. Subscribe below to get notified when I post new updates.
Be yourself; Everyone else is already taken.
— Oscar Wilde.
This is the first post on my new blog. I’m just getting this new blog going, so stay tuned for more. Subscribe below to get notified when I post new updates.
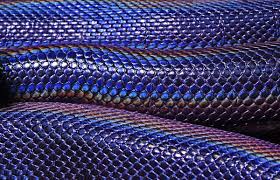
Texturing and colouring, one of my favourite steps of the creation of my character. I tried to go for a bluey colour for my character, this reference image was used as a starting point:
I went much more blue than this with white highlights in some places on the body, the skin texture I wanted a little bit scaley so I used a stamp in Mudbox. Some images below of my outcome:

I had a lot of complications trying to get my model transferred back into Maya properly. Importing the displacement maps and normal maps I did get to work in the end (but it took me about twenty tries!). Textures and colours were not working my favour, I tried everything but I could not get them into maya properly, this resulted in me using different colours in Maya for my final render with Arnold. Images below are my results:
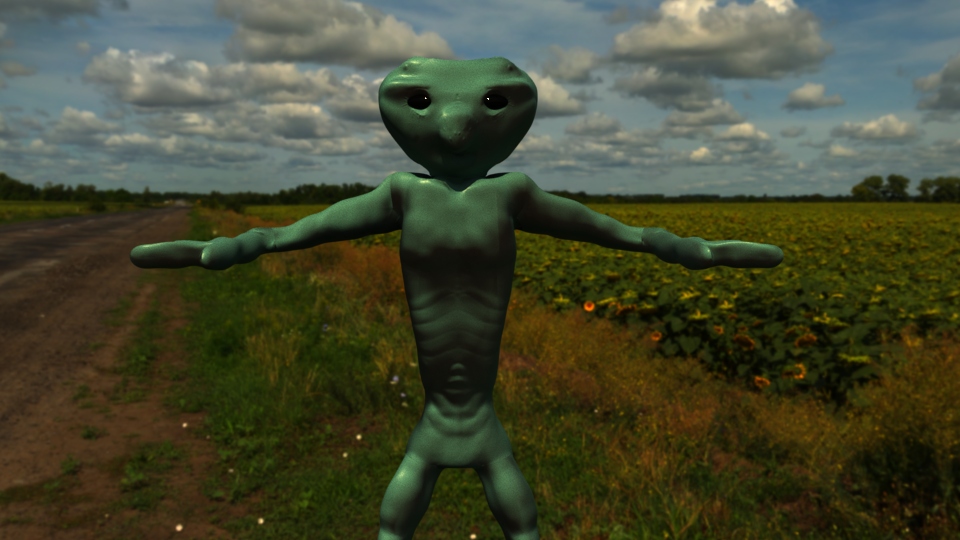
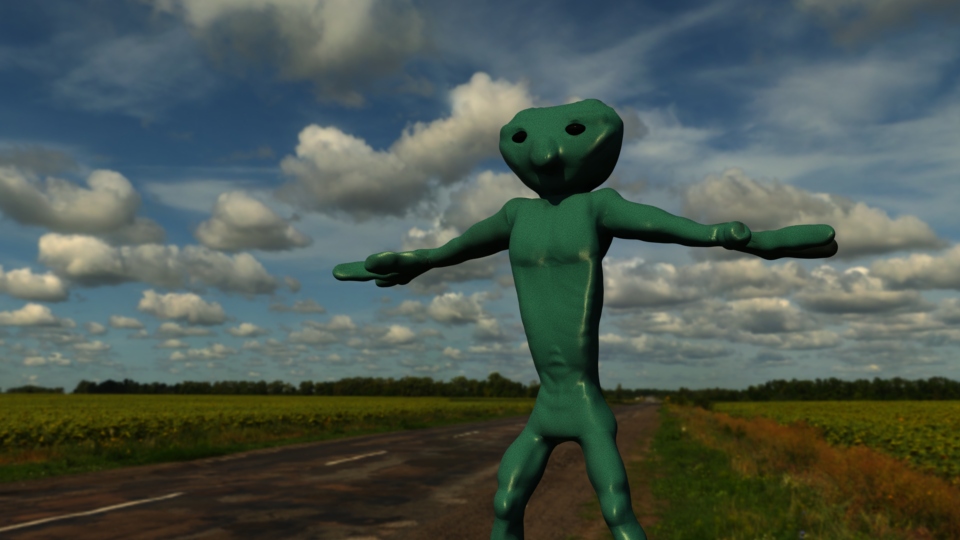
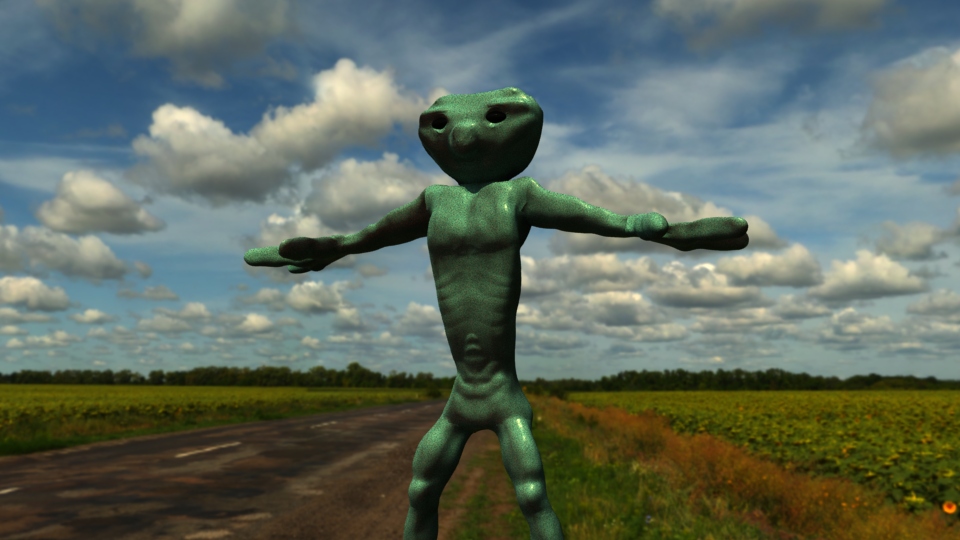
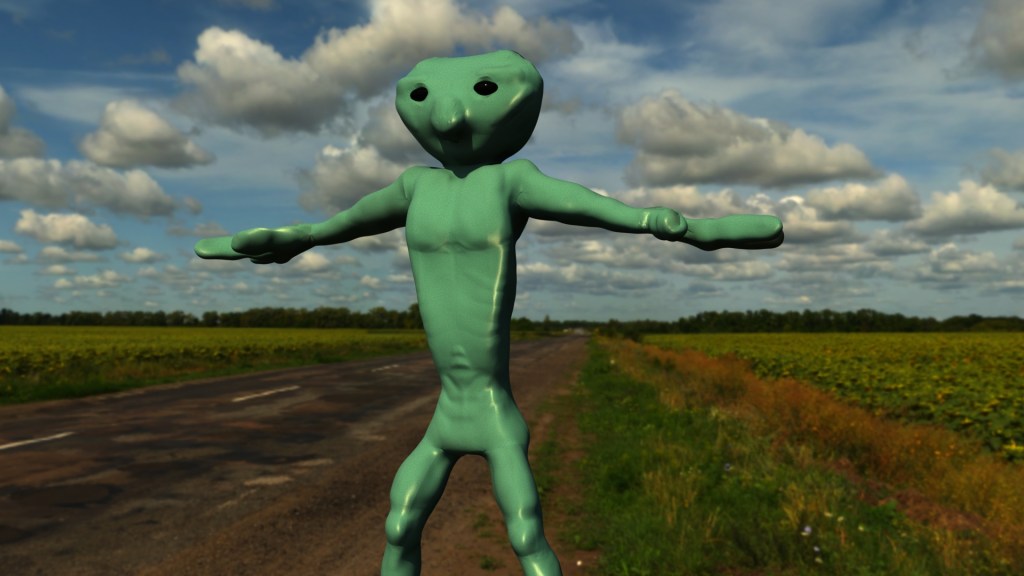
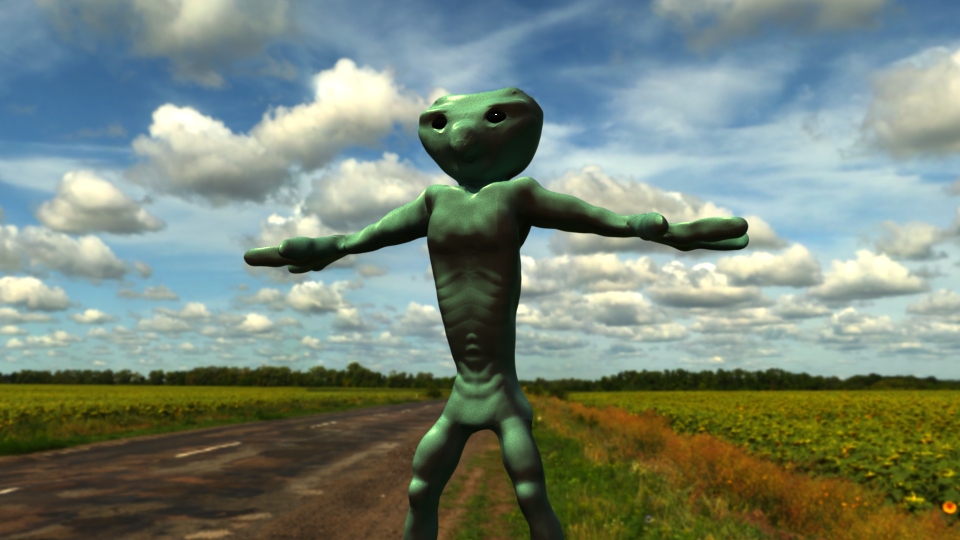
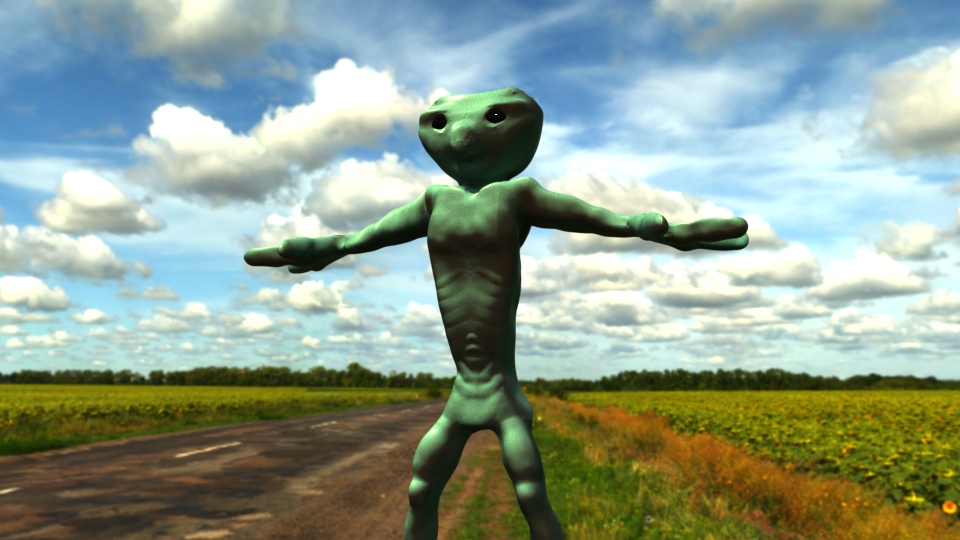
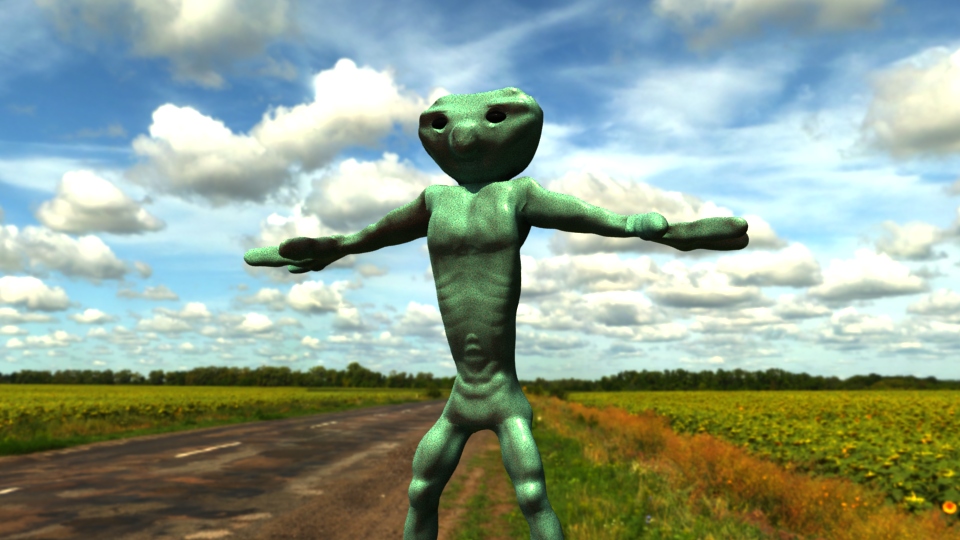
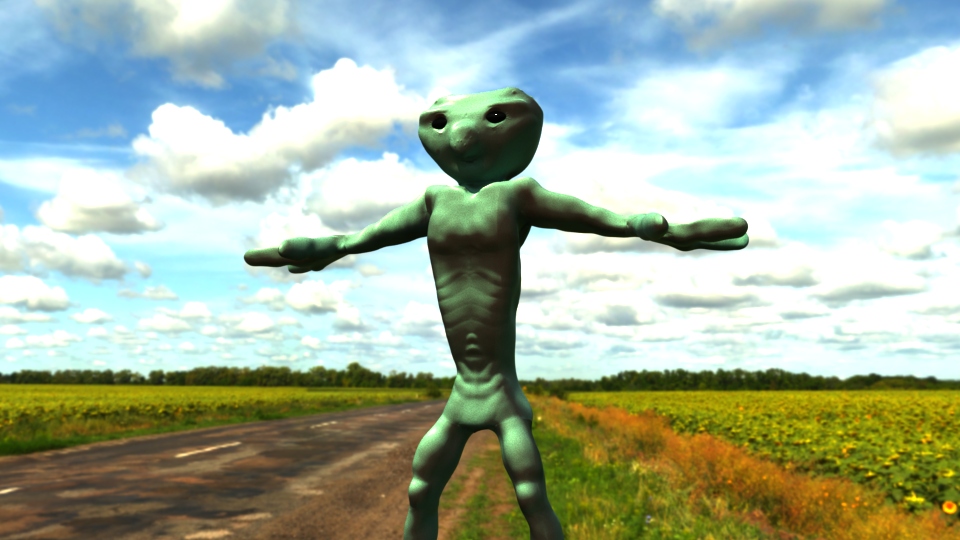
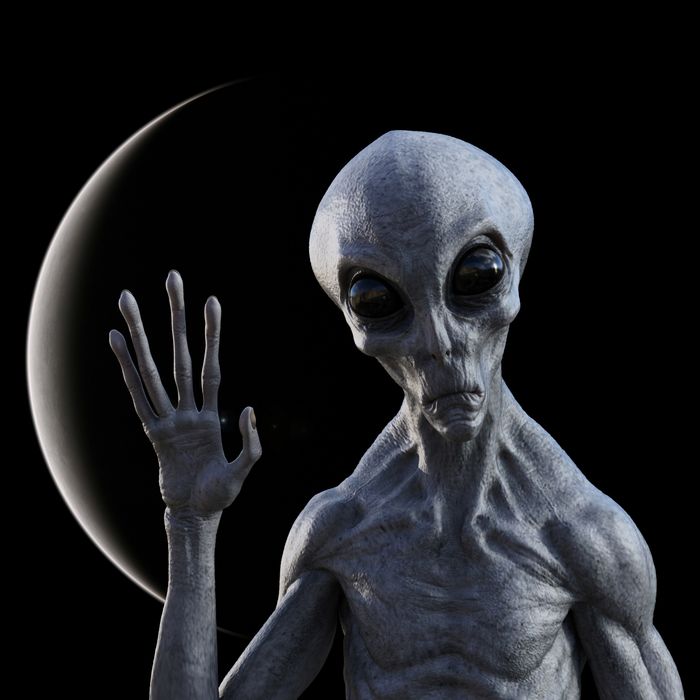
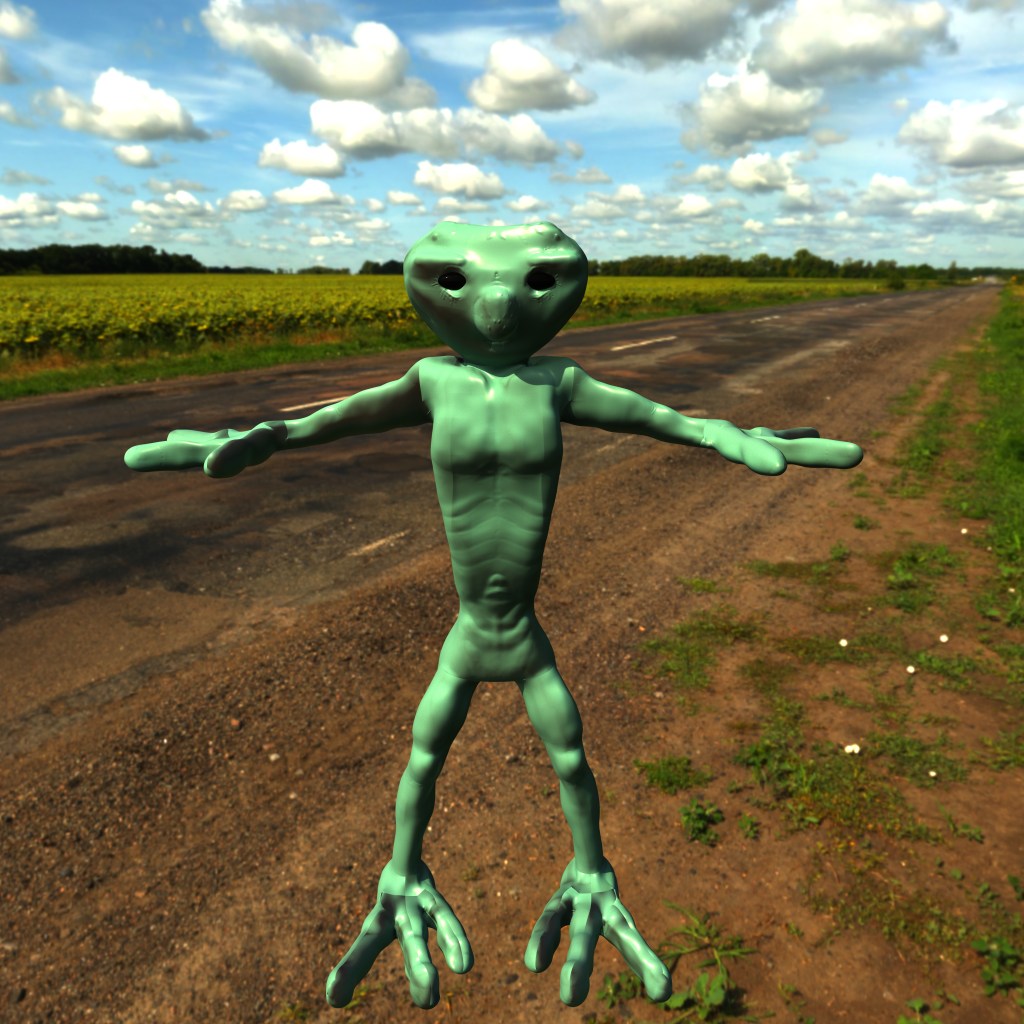
Another complication I ran into was lighting, and that could of been the HDRI File I used, I tried my best in getting the best possibly lighting settings. Overall I am quite happy with my final render, there are many things to keep working on and keep practicing. Therefore I present my ‘Outer Space Bandit’ who crashed his ship on a farm out in the middle of no where!
This time around, I retopoed my character with less density, as last time I made the mistake of doing my retopoly to dense. As usual it takes time and I spent a good amount of time trying to get my retopoly right which lead to easier detail transfer in Mudbox and easier texturing/colouring/painting. Reference images were key to making sure I was taking the right direction with my retopolgy.
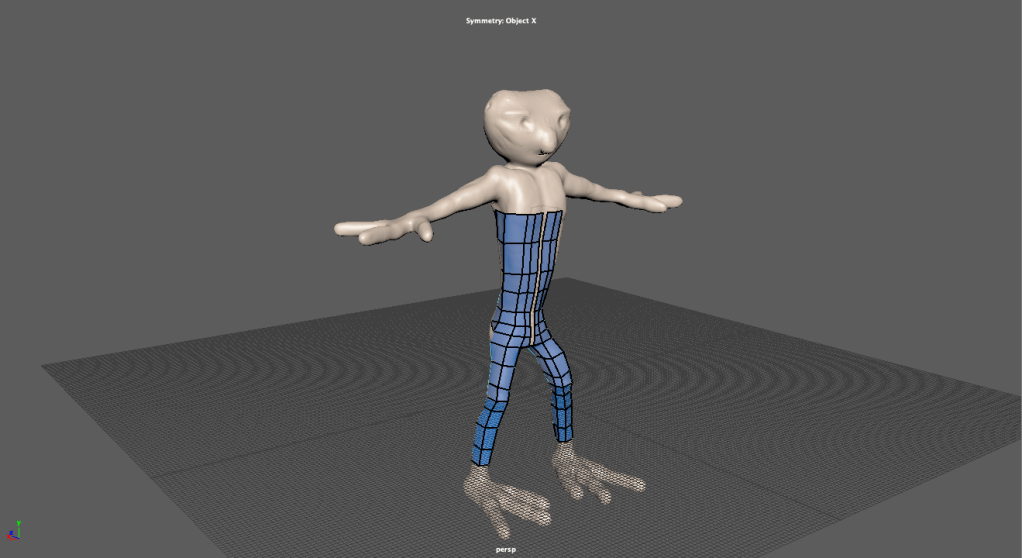
Unwrap wasn’t to difficult, I cut, separated and unfolded the arms, legs, hands, feet and head. Cutting the arms were not as easy as the other body parts. The retopology wasn’t perfect resulting in a weird cut. Below is an image of my retopo and UV Unwrap:
It is a crucial step in the production pipeline.
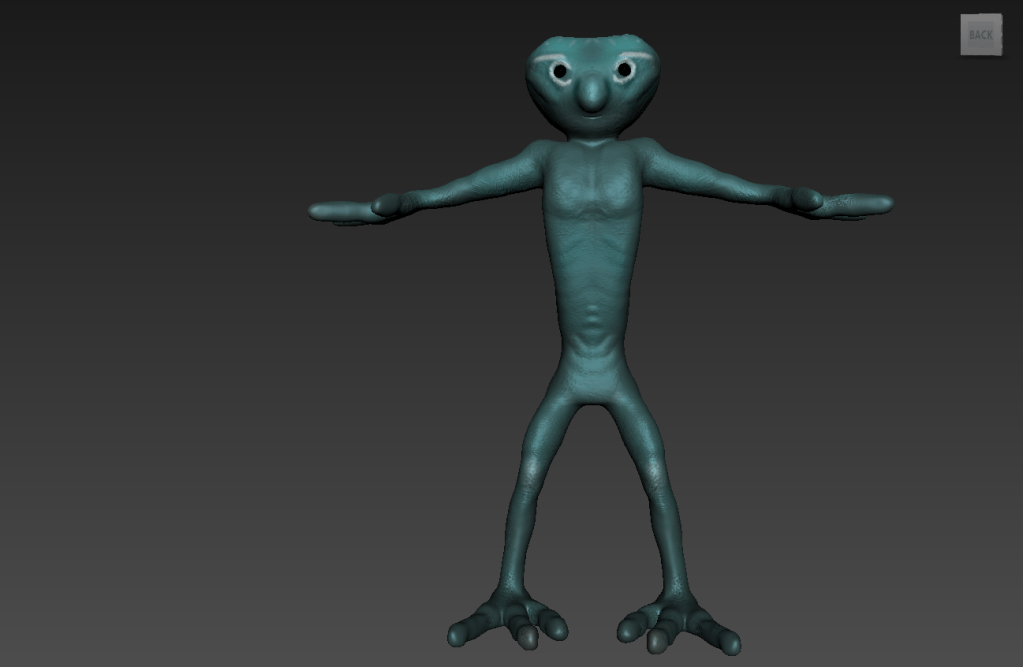
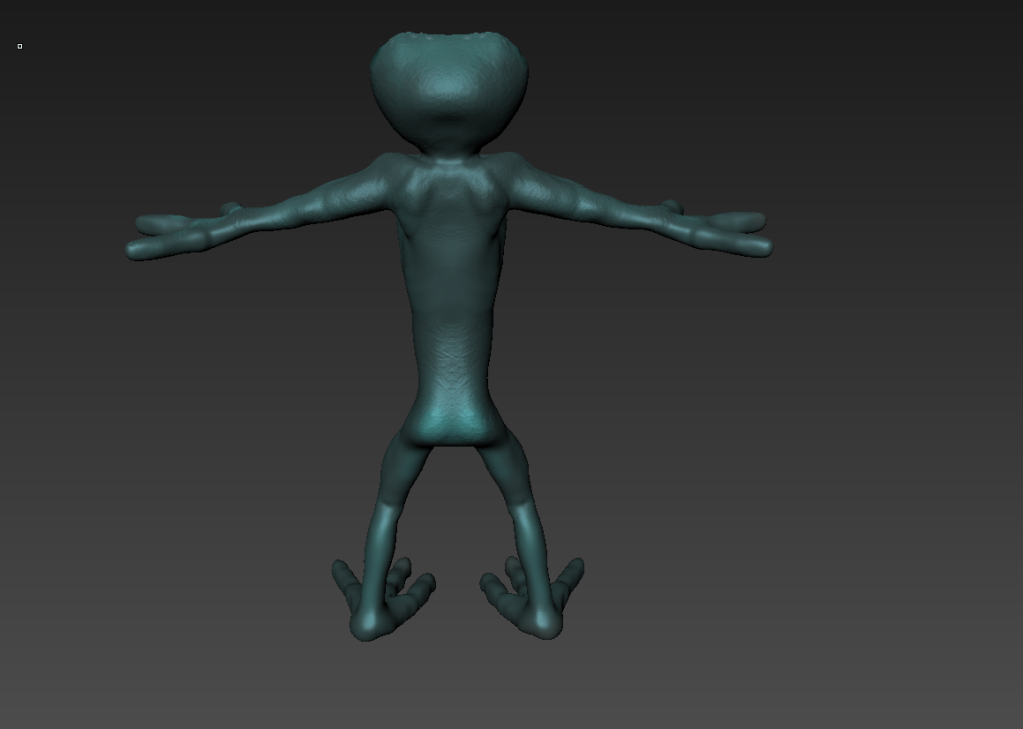
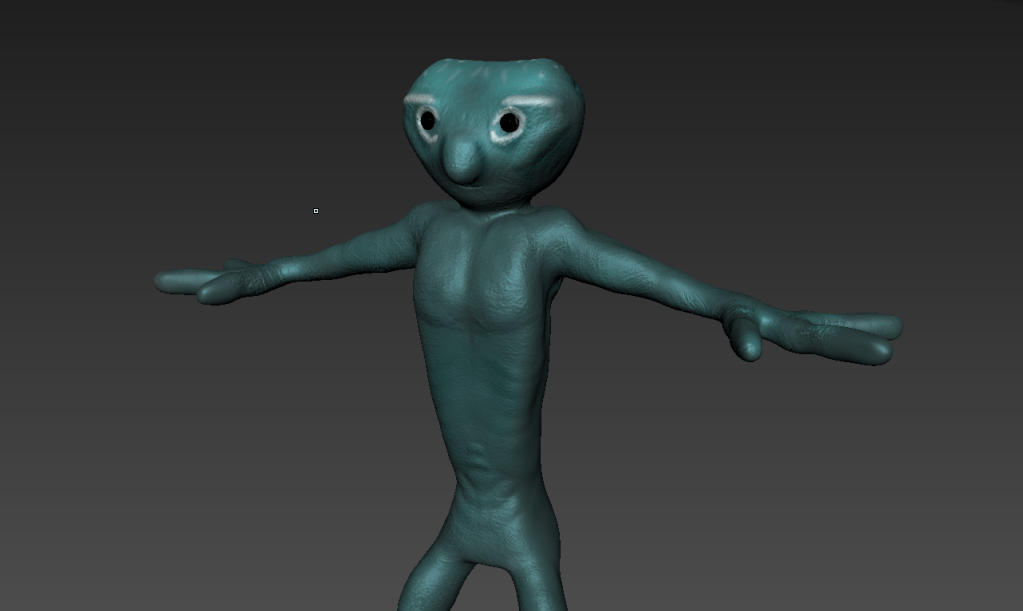
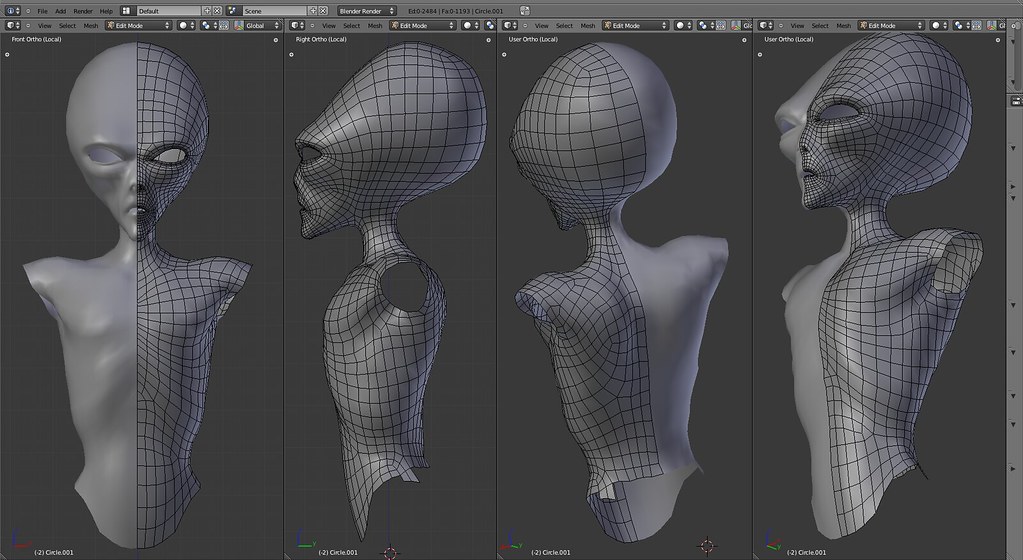
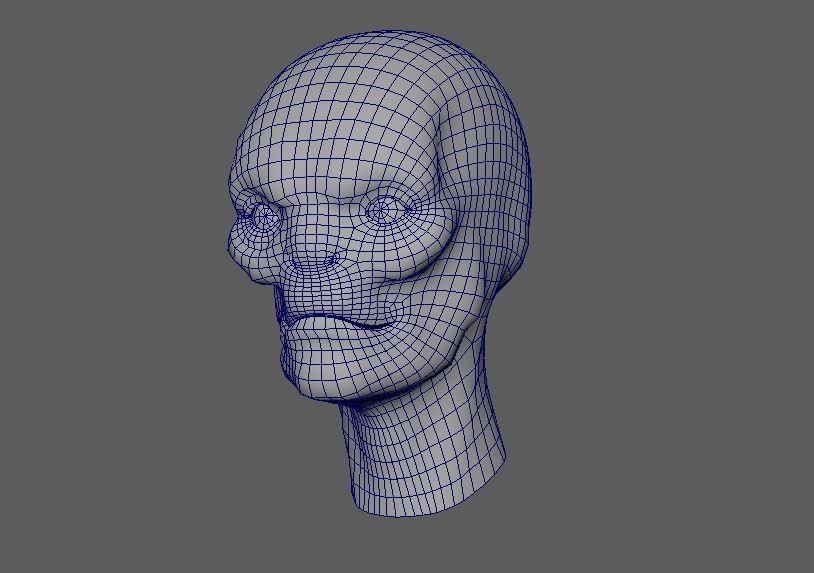
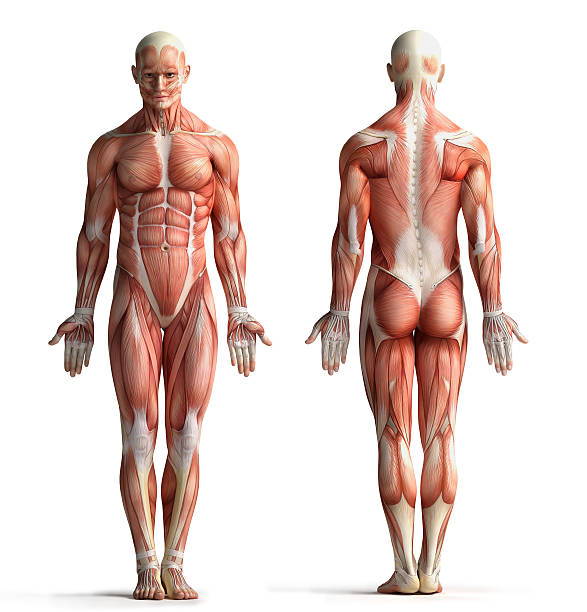
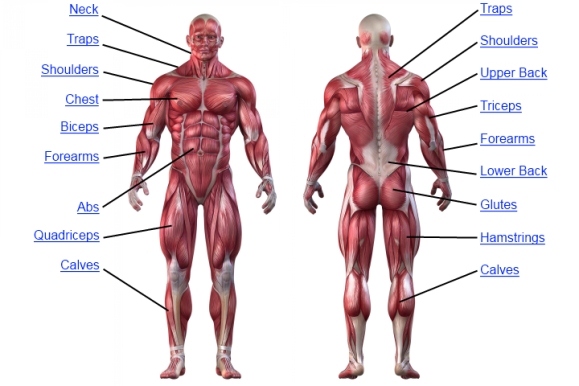
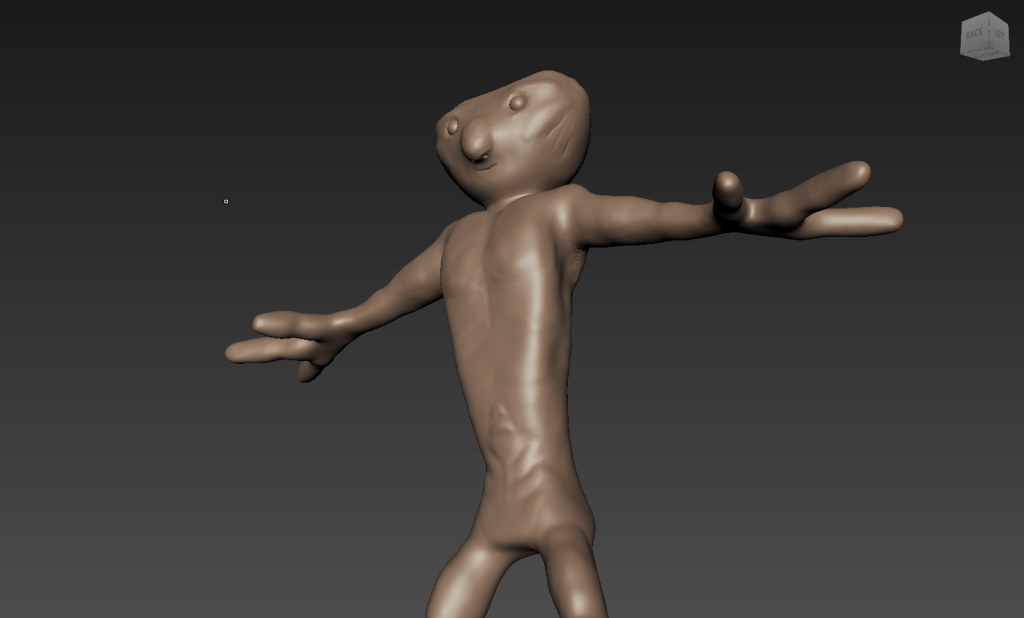
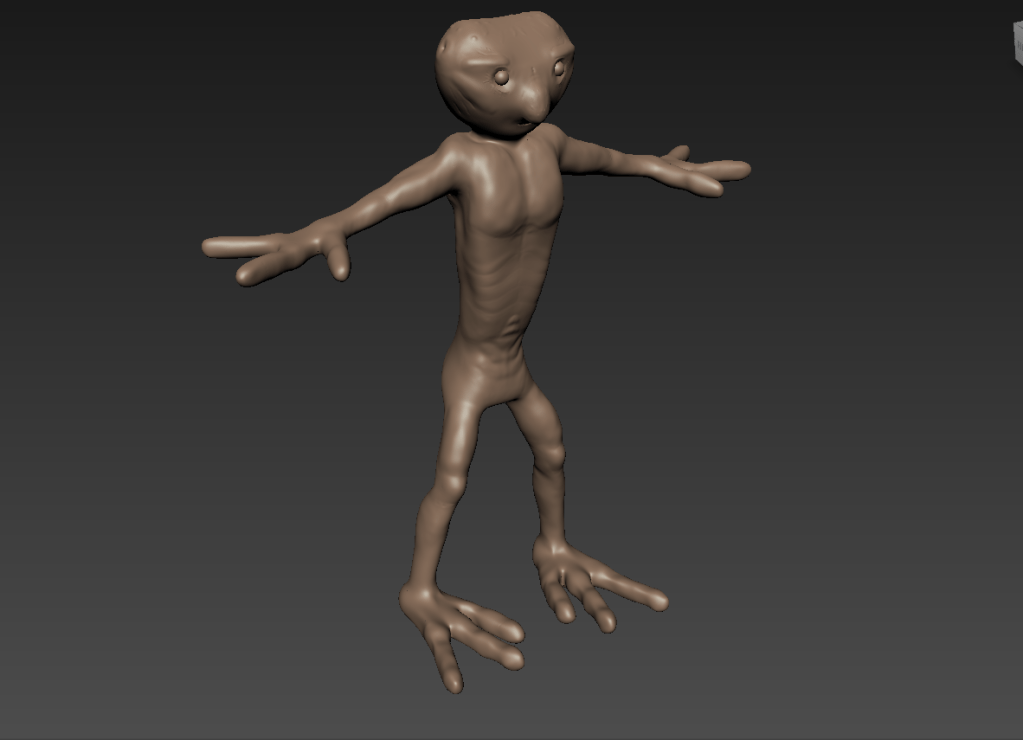
The ‘Outer Space Bandit’ block-in was ready to be transferred into Mudbox for digital sculpting, this time I was hoping to get into sculpting tertiary shapes and adding much finer detail. I referenced a few human anatomy images and websites to help me shape my model as it is human like with human like features.
Using some sources I could start sculpting in my model. Unfortunately I encountered some problems, probably with my models mesh and I couldn’t actually use any Mudbox sculpting tools on some areas, which was absolutely frustrating as I tried many ways to fix the problem. Apart from that issue I think my sculpt was more in depth than my first creature design (Kygro).
I still think I have a long way to go with digital sculpting, it is quite tricky. I will achieving to get better and improve each time I sculpt.
After completing my first creature model (Kygro) I was into thinking about my character creation. Most importantly I needed to look over the mistakes I made the first time around, this would be key in the progress and flow of the next model which was going to be an outers pace character of some kind.
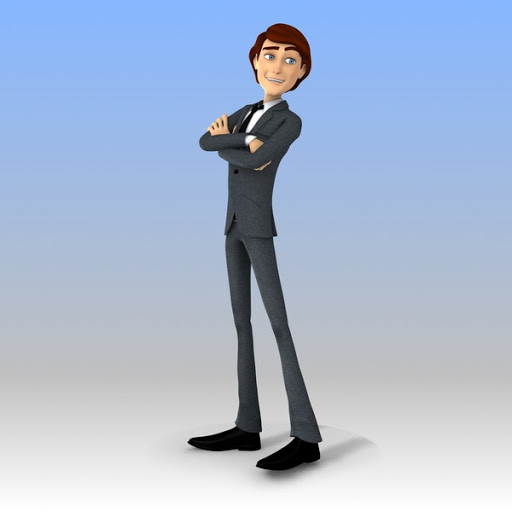
Starting to sketch a couple of ideas, it came to me that I wanted to do an ‘Outer Space Bandit’ a creature from an undiscovered species that had landed on earth by accident. The reference images I was looking for were images of characters that were tall, skinny, slender etc. Ones that were kind of pointy as well. I wanted my character to have bigger hands and feet to create a more space character look and feel. Some reference images below:

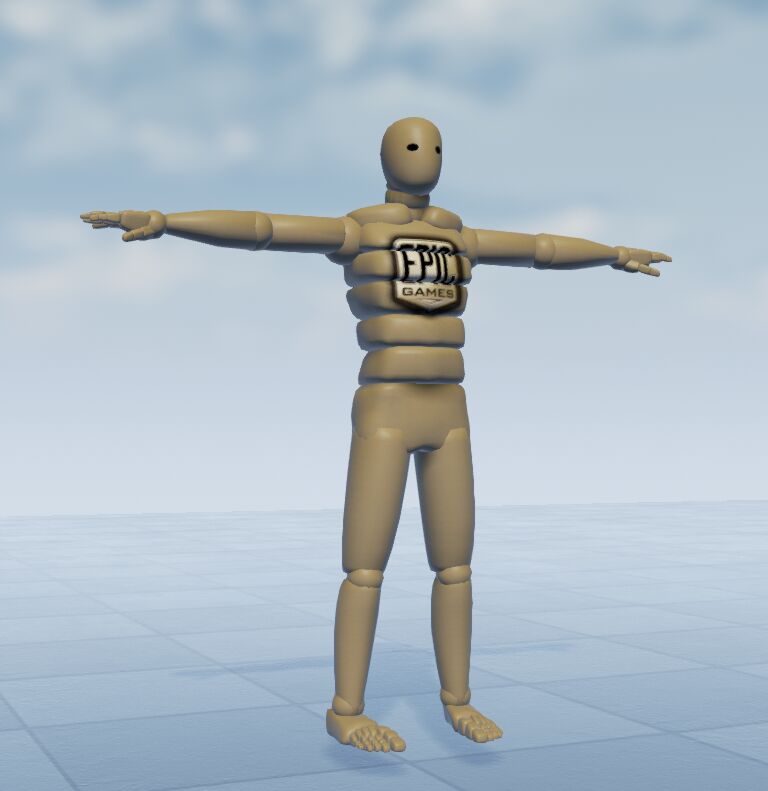
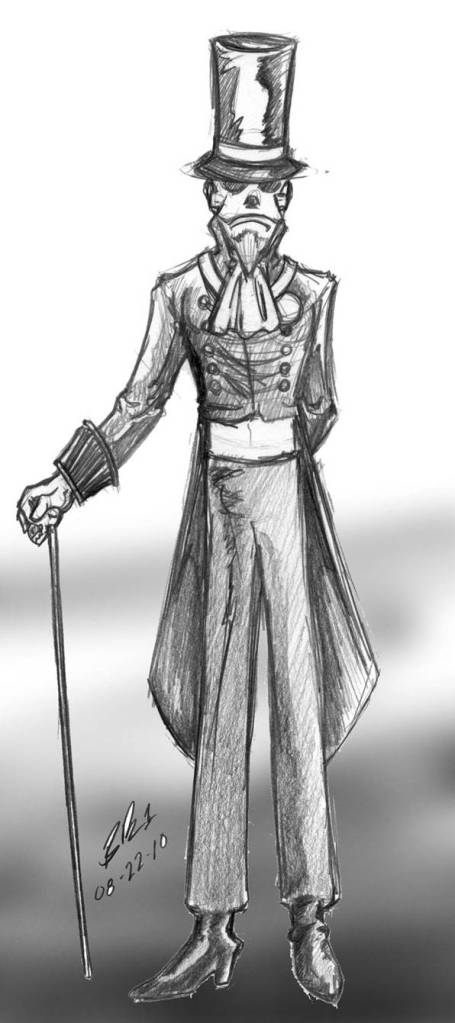
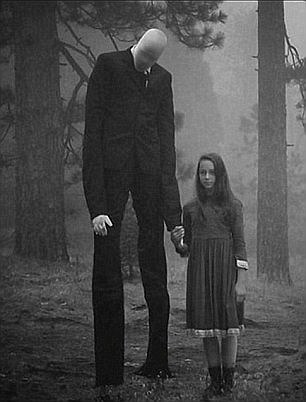
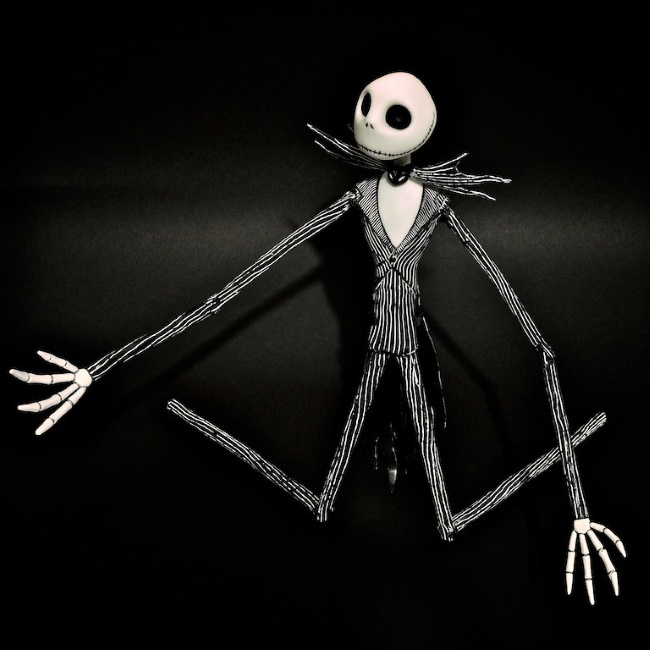
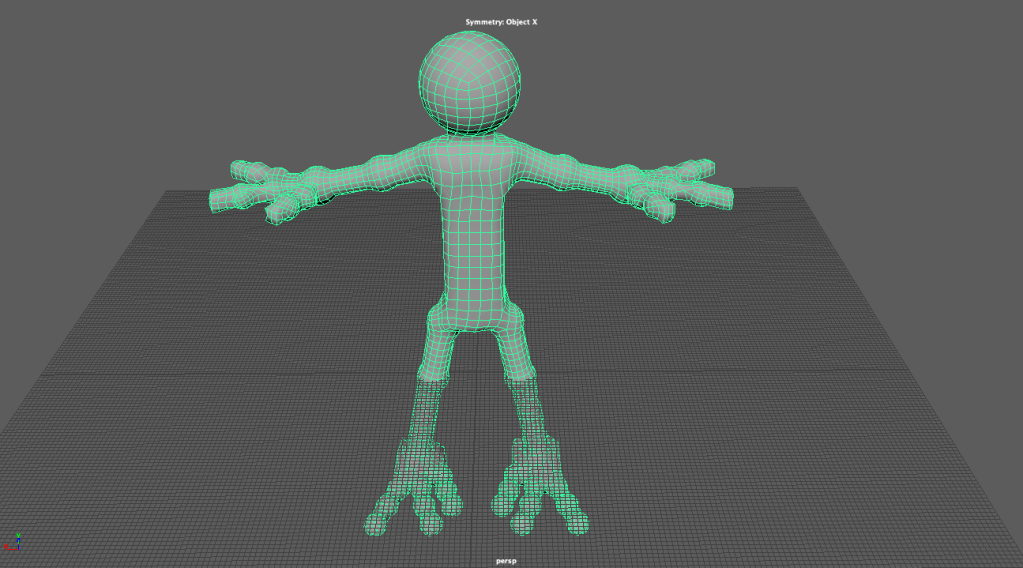
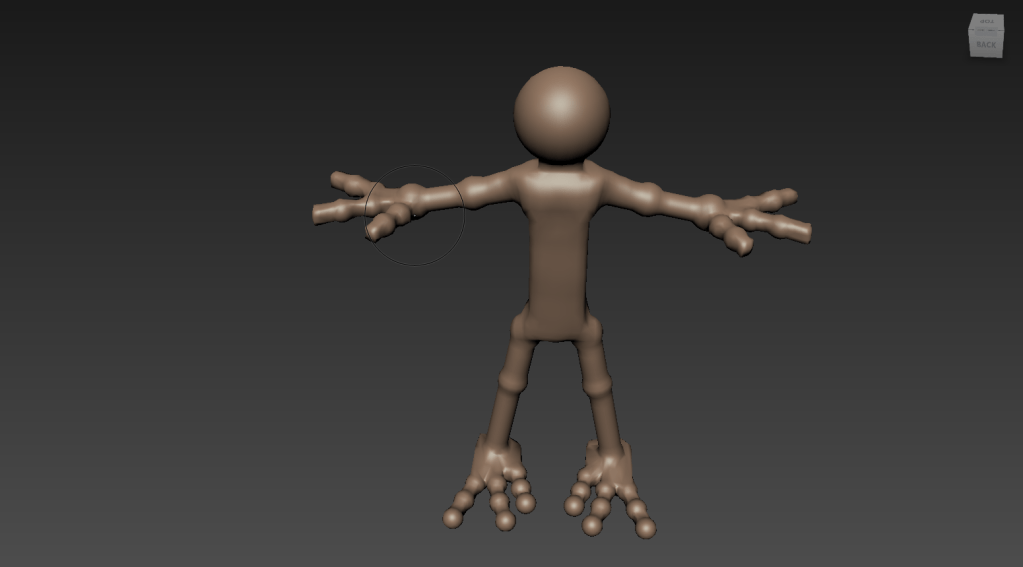
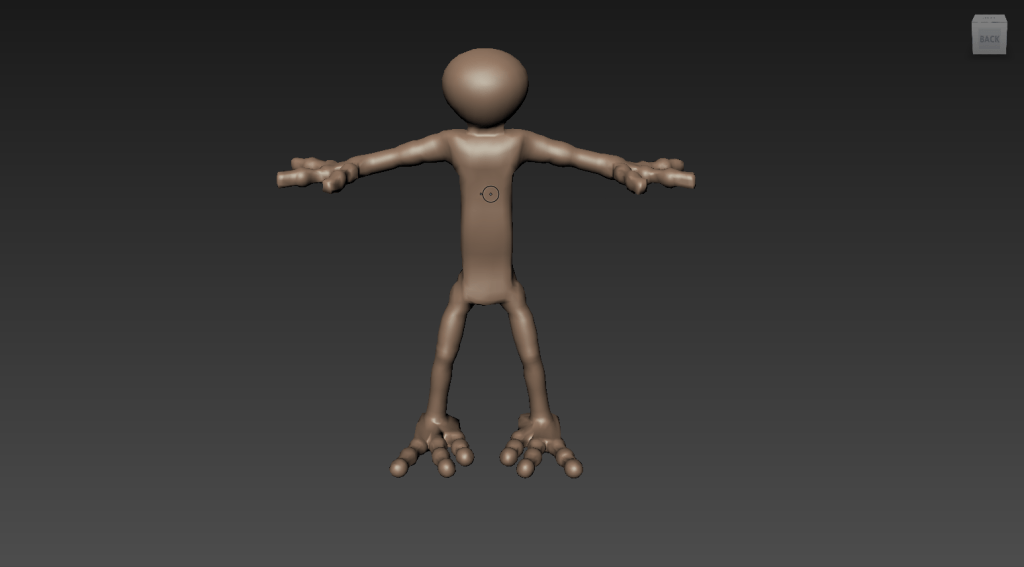
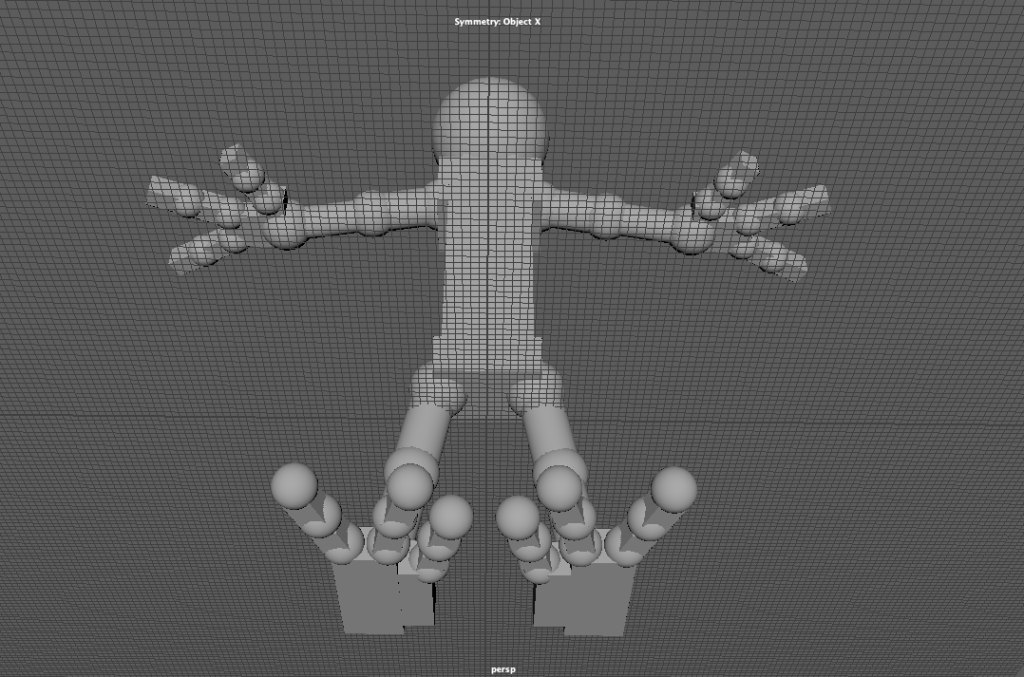
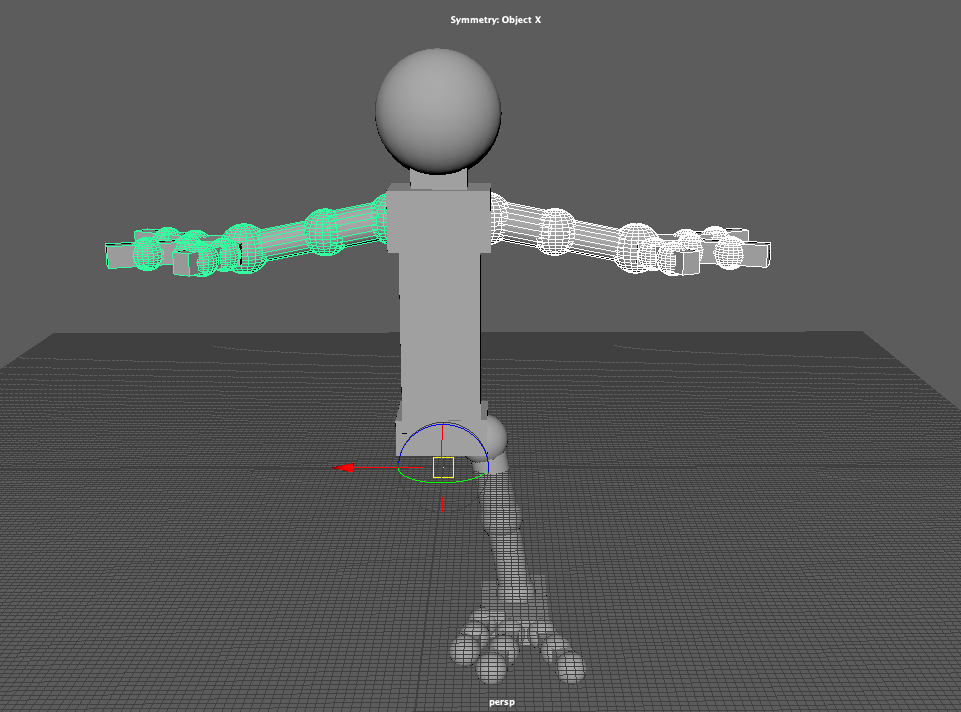
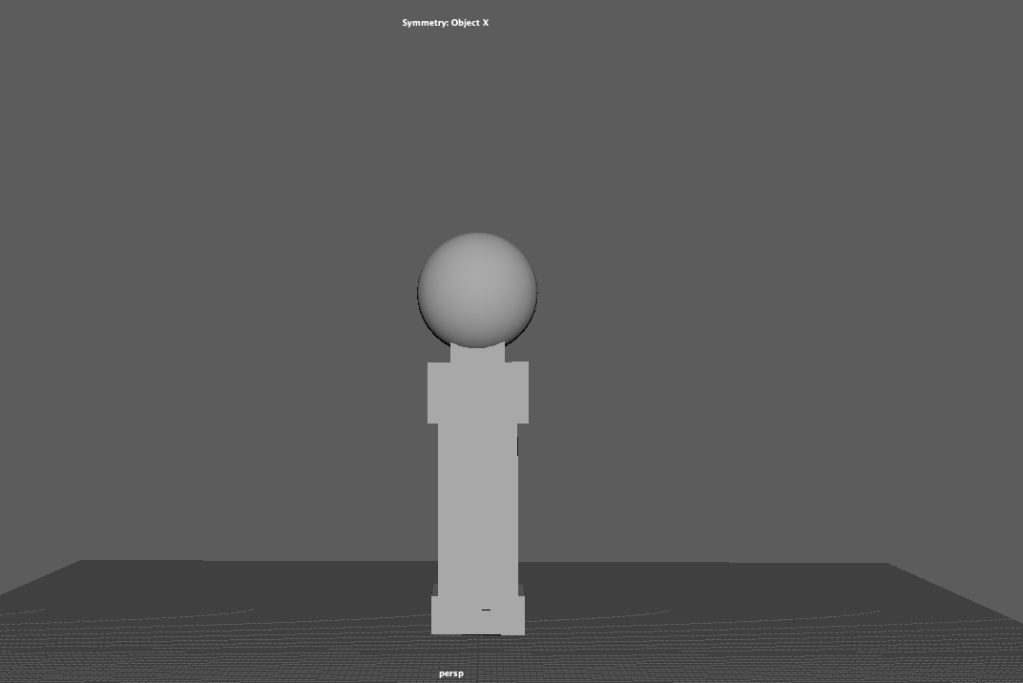
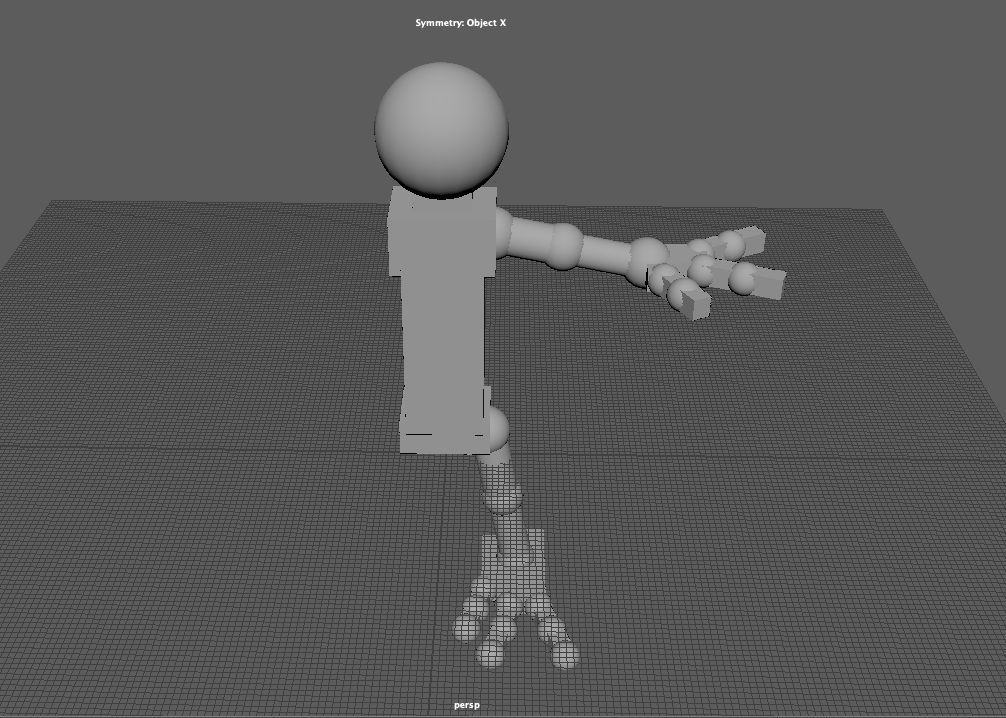
After getting a clear image in my head of what I was going to model, it was time to start blocking in, this took time to get right so sculpting would a little easier. Here are some images of the block in of ‘The Outer Space Bandit’:


After texturing and colouring my model, it was time do a final render in Mudbox. This took a bit of messing around with settings and angles but I thought the final result came out pretty good.

Not to bad for my first creature, there is definitely improvements to make for next time round.
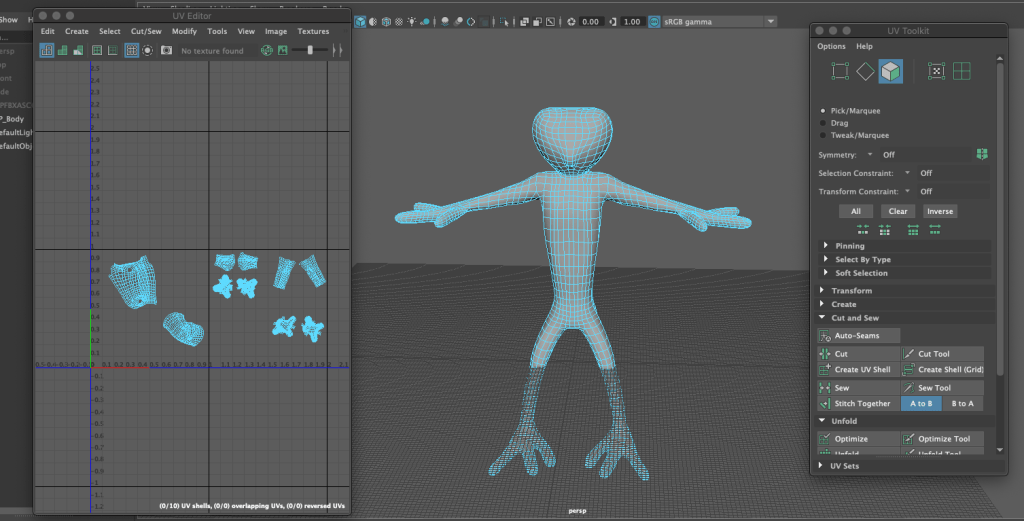
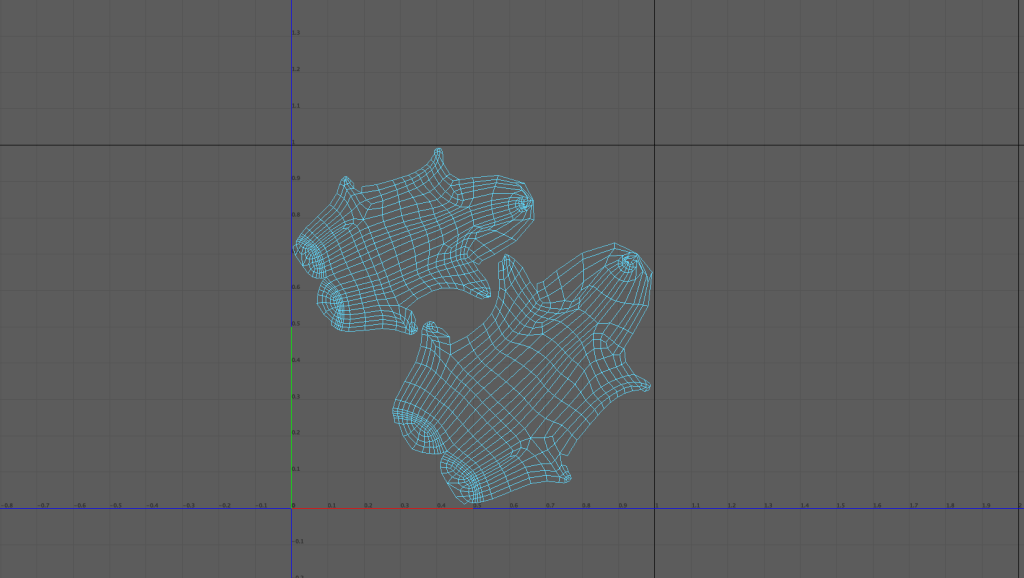
UV unwrap is crucial when the it is time for texturing and painting my model. UV unwrapping is taking a 3D mesh and then flattening it out, textures and colours can then be applied more evenly.
This can a be a difficult process, I found some of my model quite messy (Retopology). This is effected the way I had go about unwrapping my model. Below are some images of the UV editor in Maya where I have unfold parts of my model.
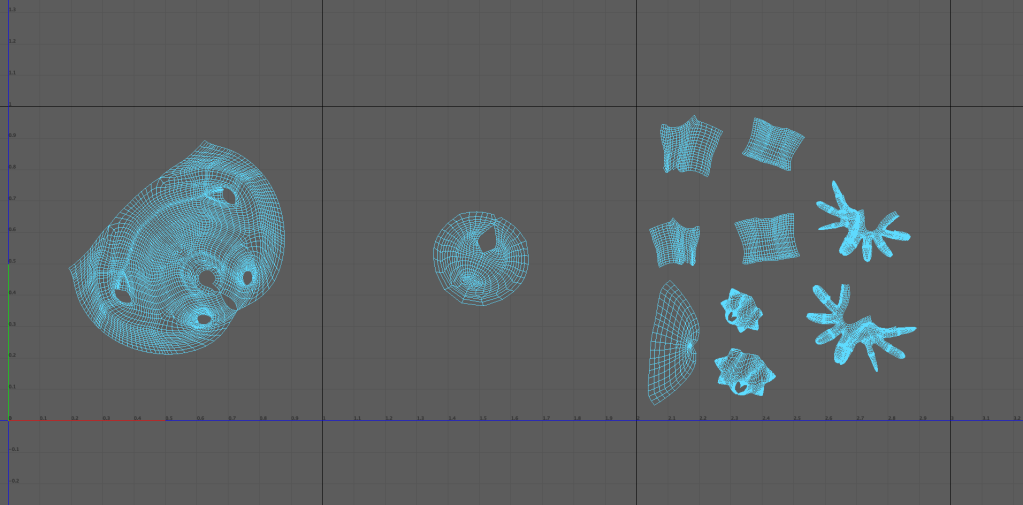
Retopology is the process of changing the flow of polygons manually on a model so it is easy for texturing, rigging, animating and rendering phases. Once I was happy with the sculpting of my model, it was time to transfer it to Maya to retopologize.
Finding some reference images for retopology was important, helping me be able to make my retopo flow better for my model. Here are some reference images I used and based my retopology on.
Working with reference images made things much easier, as it I was able to get a better understanding of retopology with them. Some reference links to a couple of articles that helped me with the process:
I ran into problems with 3 sided polygons/Triangles, having them in the retopology would cause further problems down the track. It can be difficult to remove them, and I did not end up getting rid of them but it’s a lesson learned for when I was to come to do the retopology of my next model. Another issue that I had realised after I had done the retopo for my model was that the poly’s were quite small and this made the poly count quite dense, although this is managable.

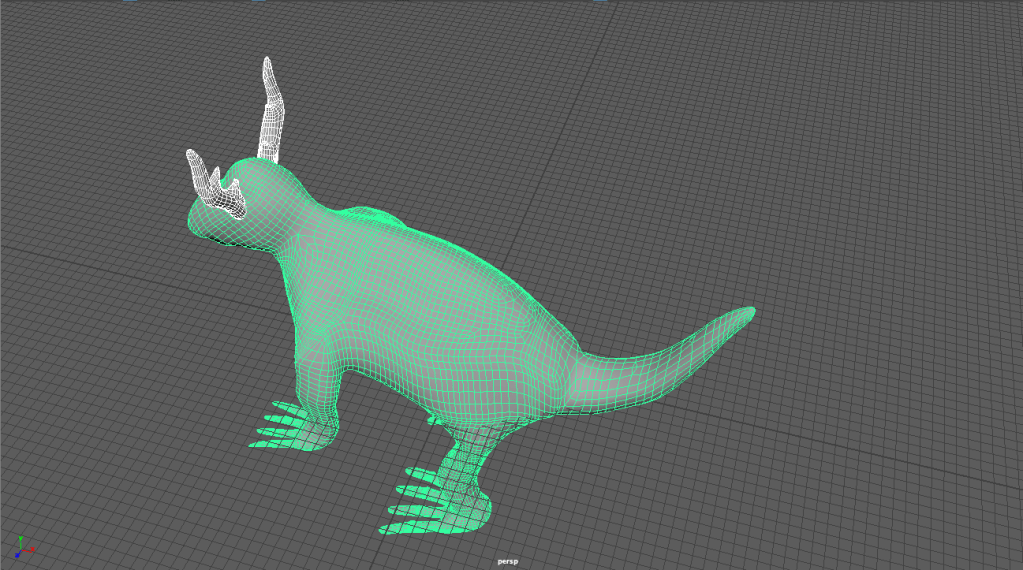
My retopology process was an in experience and learning curve for next time.
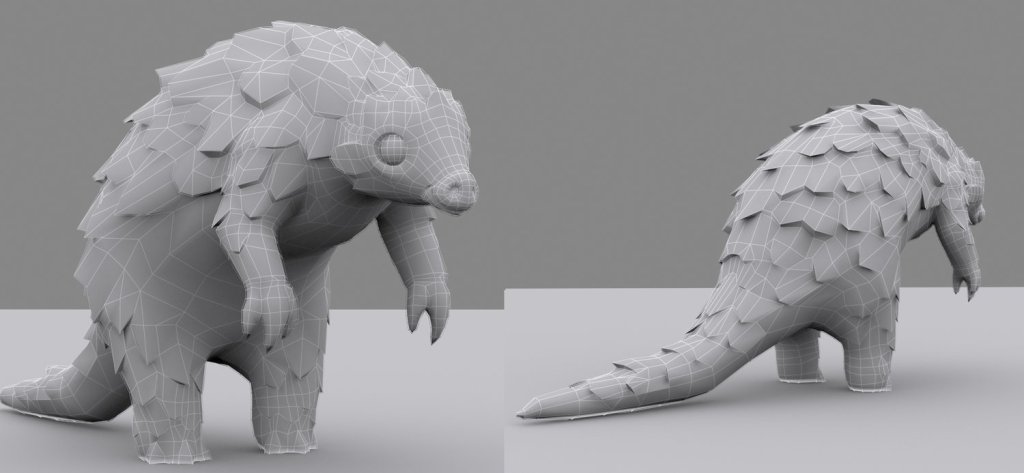
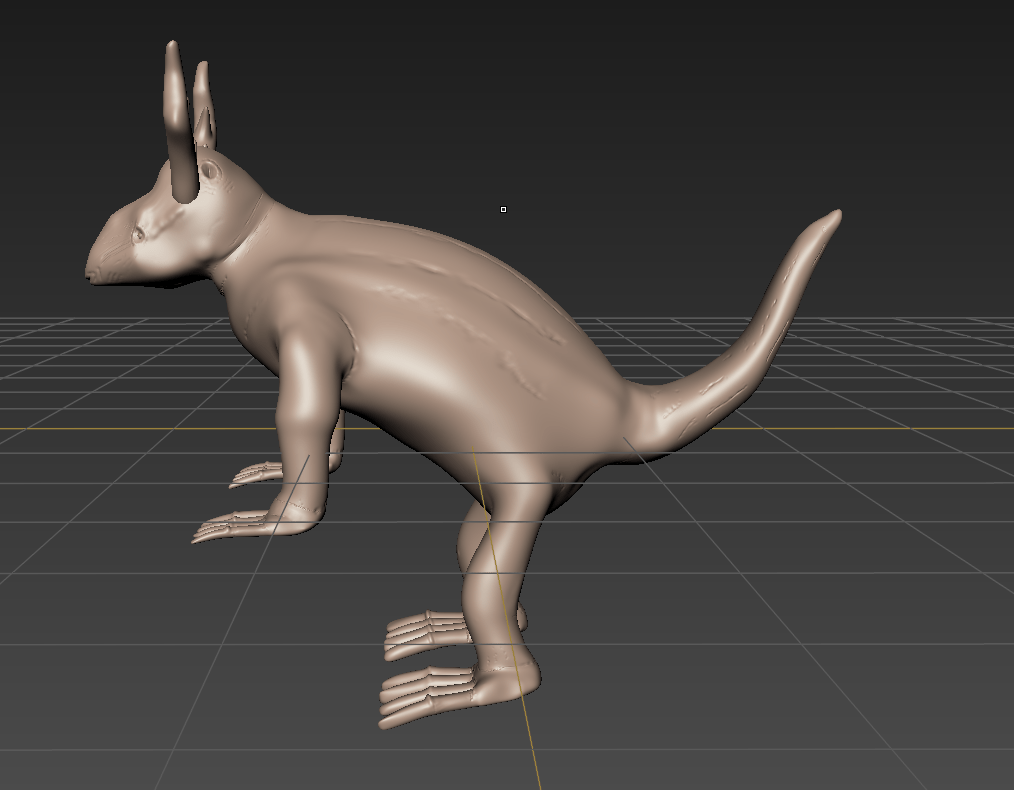
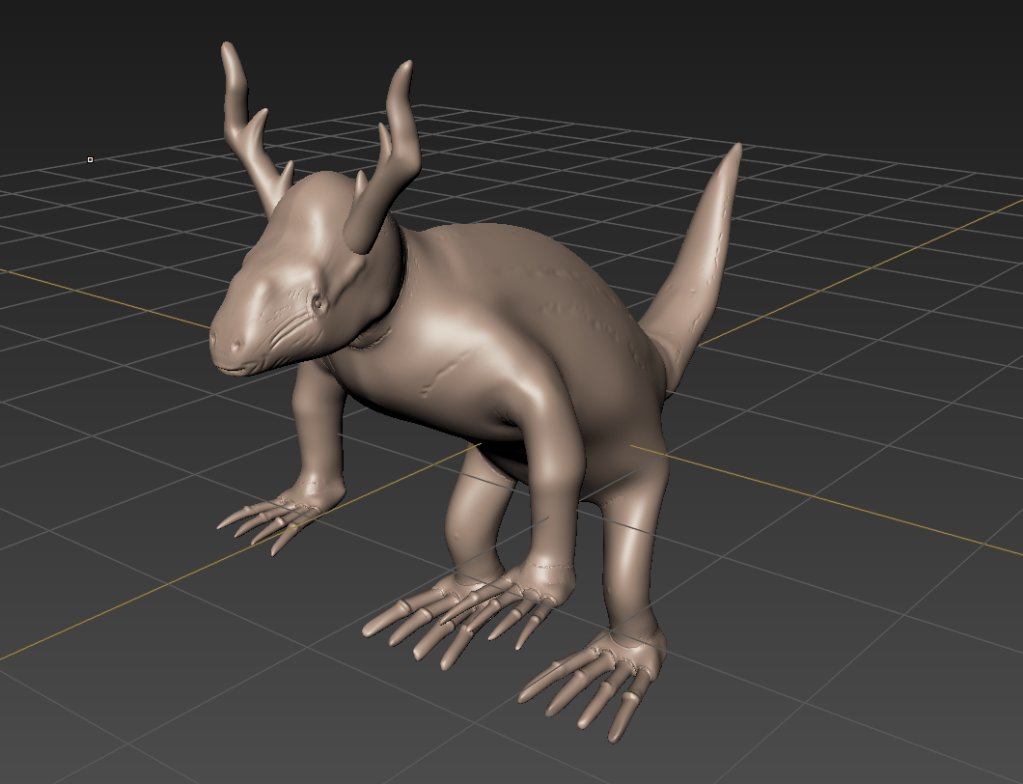
After blocking in my creature using primitive shapes, it was time to get into Mudbox and to start slowly sculpting my creature. Digital sculpting is the equivalent to physically sculpting with clay, I would start to define my creatures shape (body, head, legs etc.) and eventually start start to define the finer details (wrinkles, eyelids, nostrils, mouth etc.).
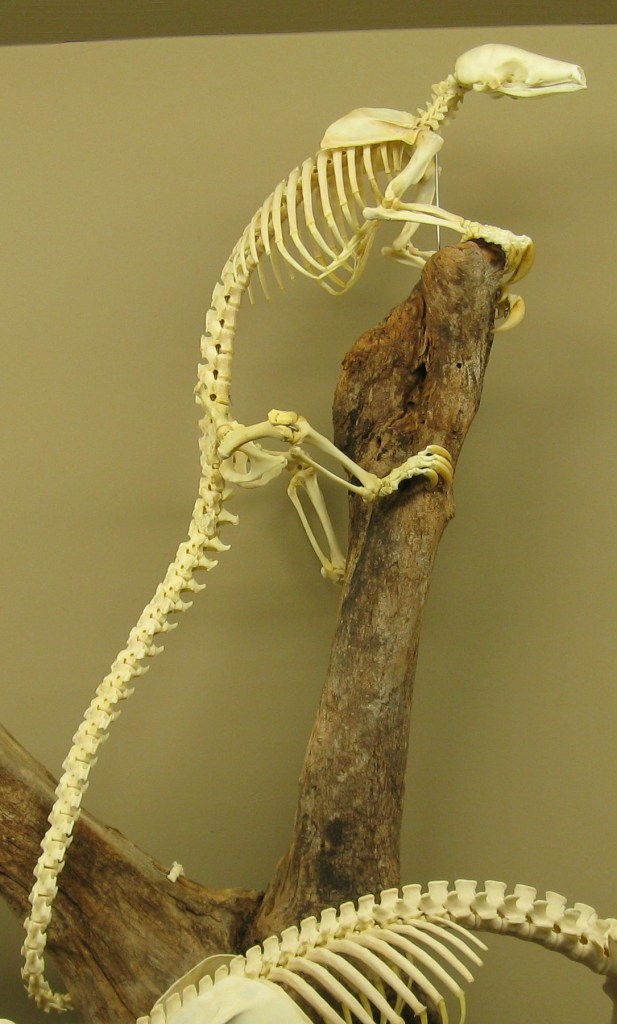
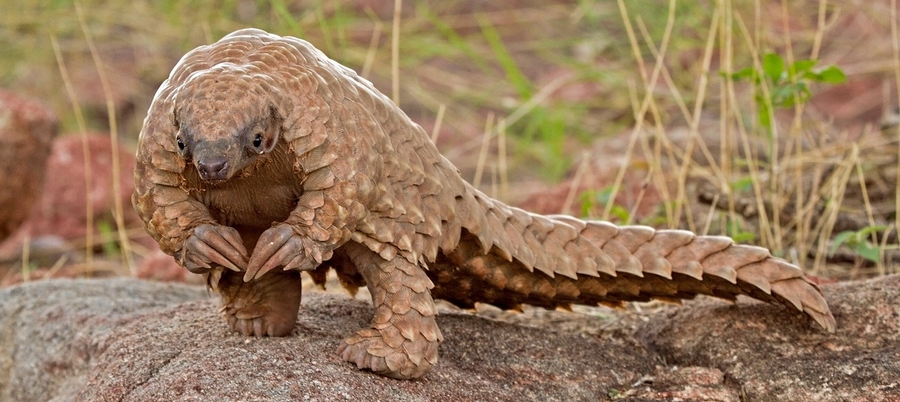
Having multiple reference images would help me with digital sculpting. As I was needing to achieve the shape and anatomy of a pangolin, I had a few references images the were most effective on displaying the body and the movement of the animal itself. Here are some reference images I used whilst sculpting my creatures overall body including the legs and claws/feet.
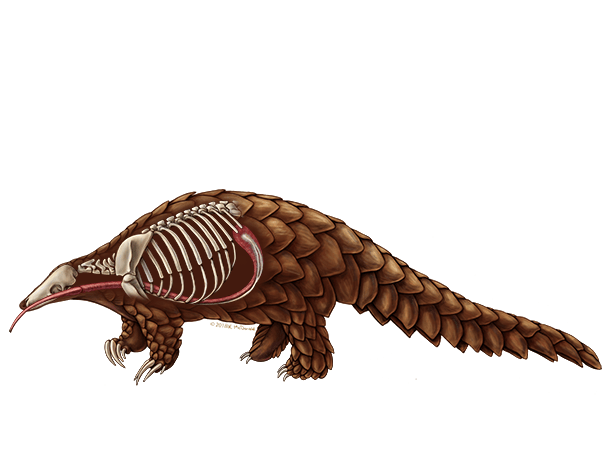
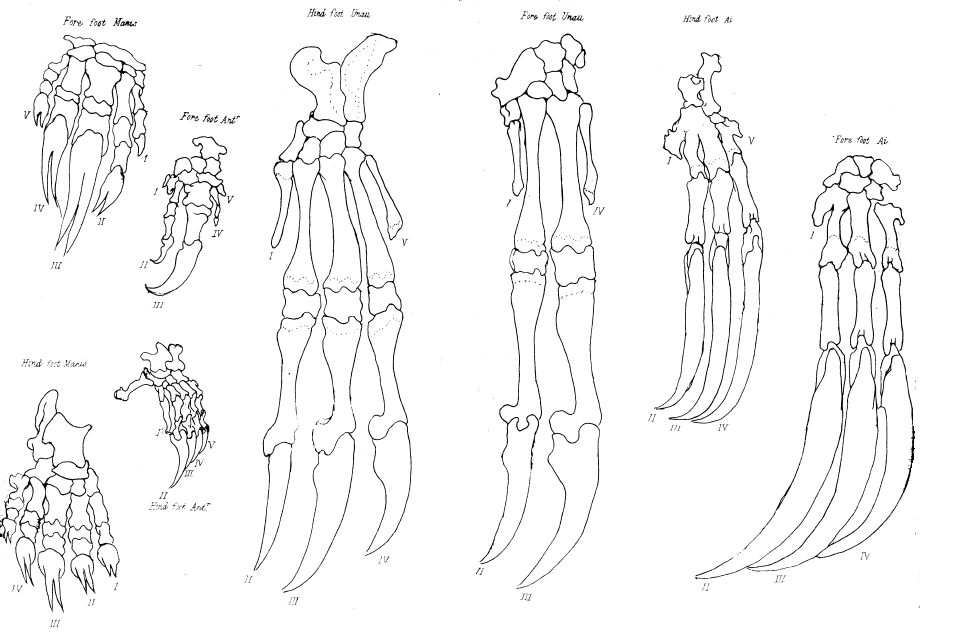

I also read some articles reflecting on the anatomical studies of Pangolins, sadly I wasn’t able to find a lot of information regarding the Pangolins anatomy. Here are some articles and websites I researched to gain a deeper insight.
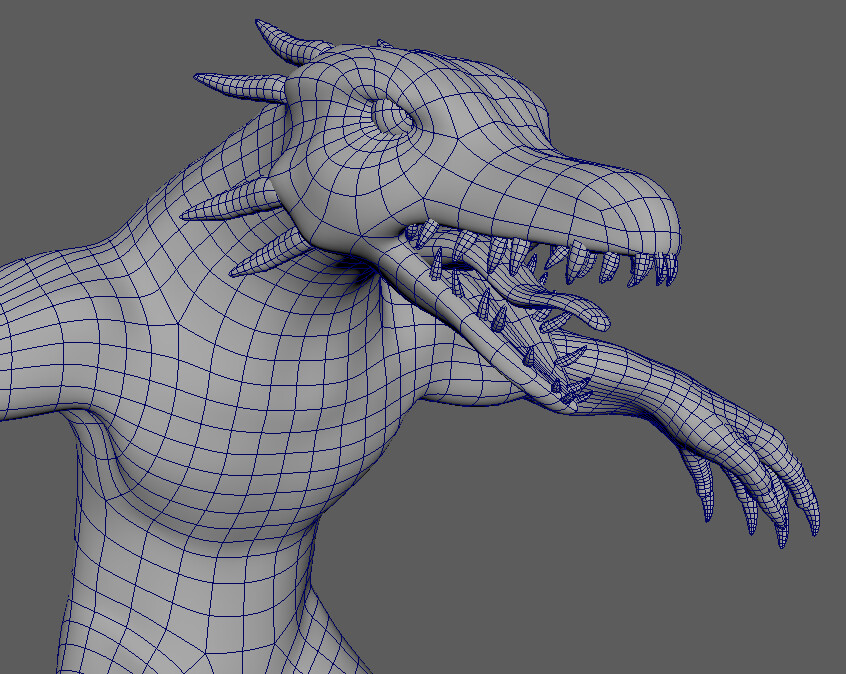
I followed the same process, thinking about how I was going to sculpt my Rhinoceros head to make it flow with the body.
After gaining information of the anatomy, my digital sculpting was underway. The main tools I used in Mudbox to sculpt were the Sculpt, Smooth, Grab, Wax, Knife and Buldge tools. I’ve included some screen shots to show the results.
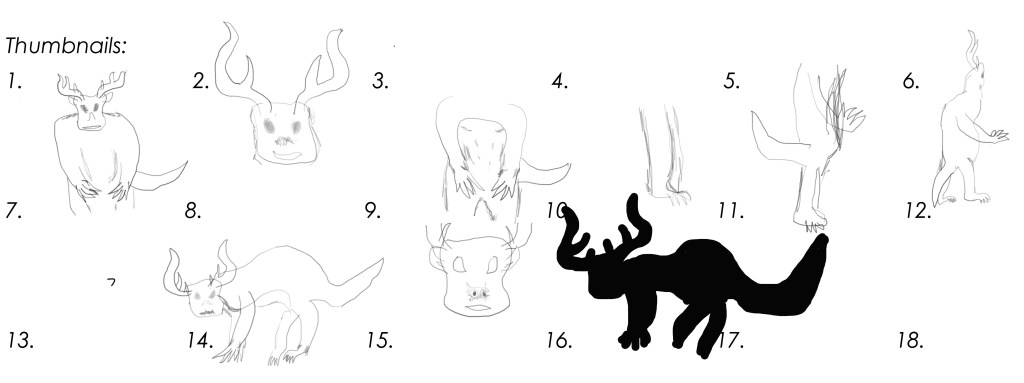
After finalising my creature, within my character creature design worksheet I was able sketch in some thumbnail drawings of my creature. This was a process of figuring out how the creature was to work anatomically and visually, with each component that I had chosen from these three animals; A Rhinoceros, a Deer and a Pangolin. Going with my initial idea of combining the head of the Rhinoceros to the body of a pangolin and then attaching antlers from a deer. It flowed well and it was quite a simple merge of animal features.
Something to point out, the head of the Rhinoceros on a Pangolin in real size would obviously never work, so the idea is that the Pangolin’s body would be enlarged to be able to support the head of the Rhino. This also goes for the Deer antlers, realistically they would need to be enlarged to flow with size of the creature overall.
The thumbnail sketches weren’t really coming together at first, the first few were not really flowing and I was having trouble trying to sketch each side of the creature which lead to more trouble creating a 3D sketch of my creature. Even know the thumbnail images aren’t perfect it gave me a clear image in my head of how I was going to design my creature.
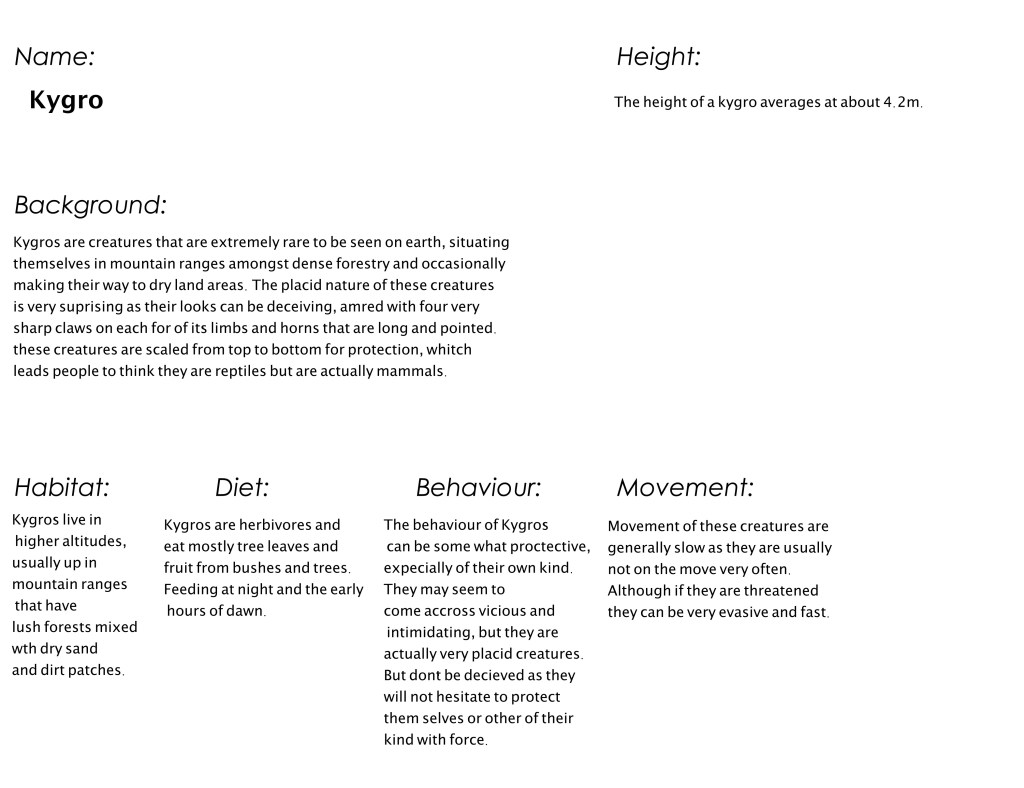
After getting a feel for the creature and visually seeing the way it was coming together, I decided to name the creature Kygro. Then I had a brief overall description of my creature including its habitat, behaviours etc.
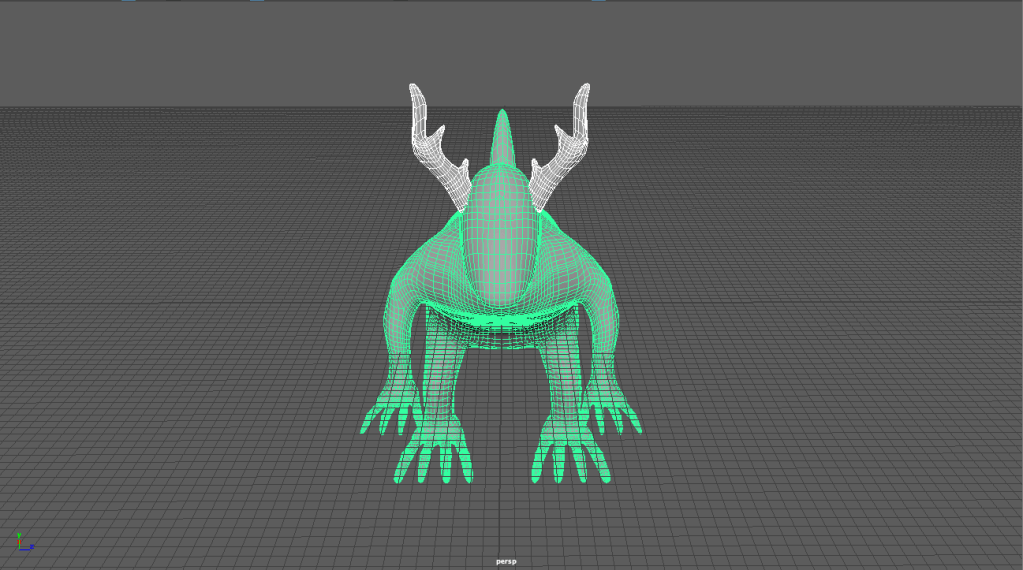
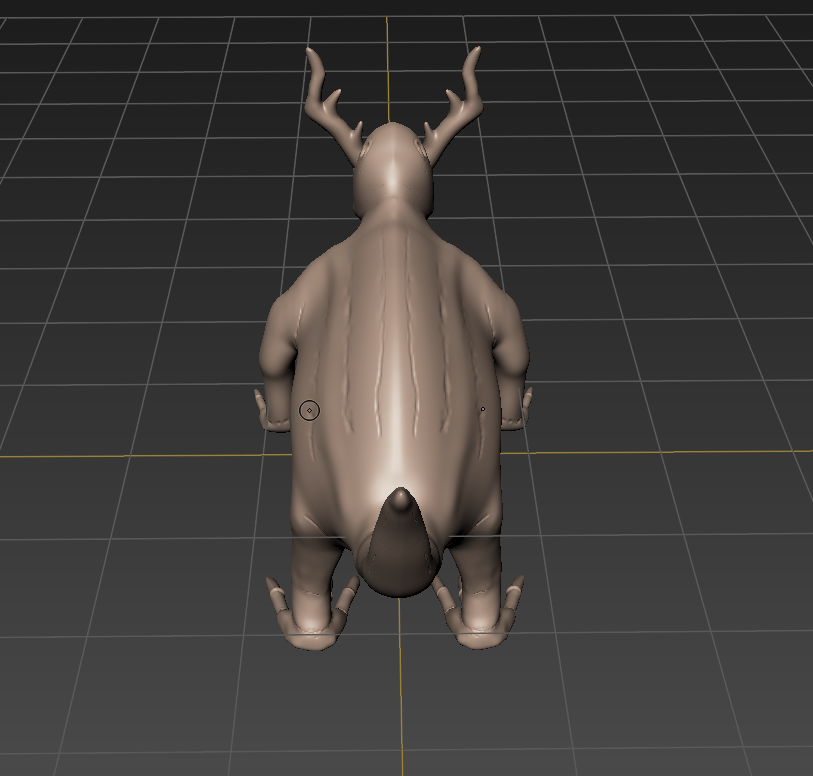
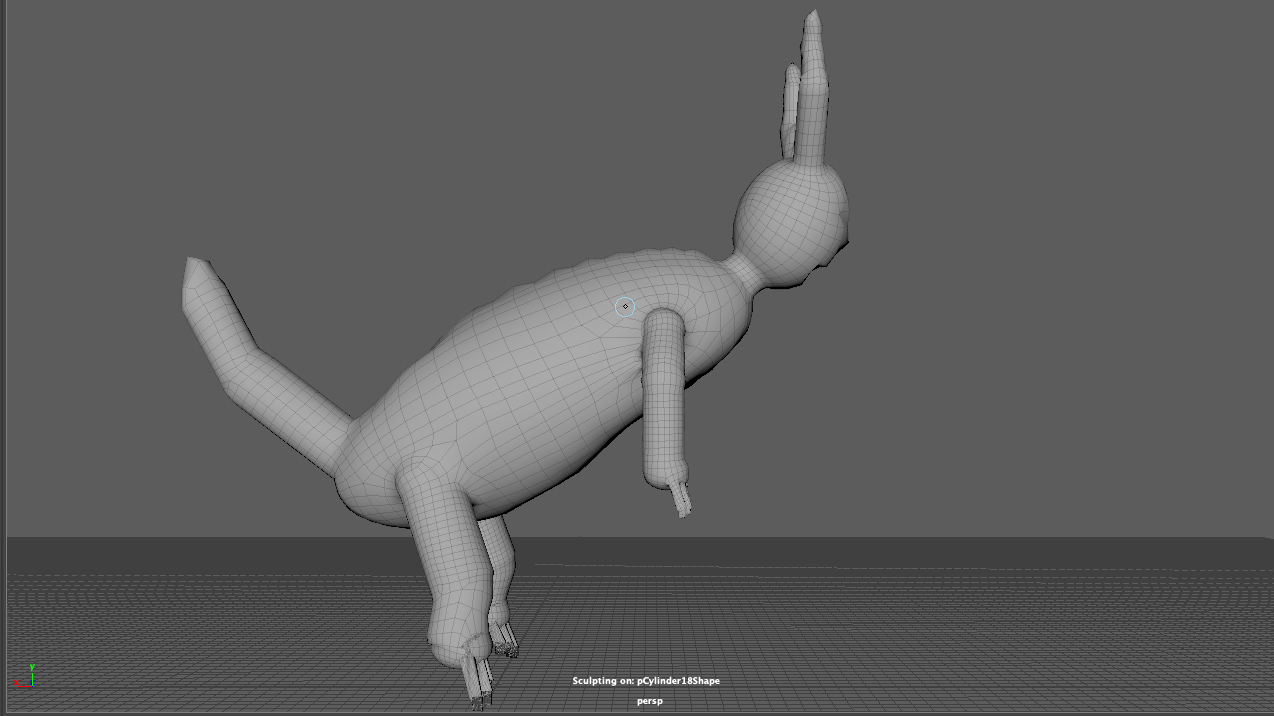
The next process involved blocking in my creature to Maya with primitive shapes, which was quite easy as detail and finer detail weren’t important yet in this stage. I was focusing on getting the creatures main body parts and joints blocked in. Here are some screen shots of the process.
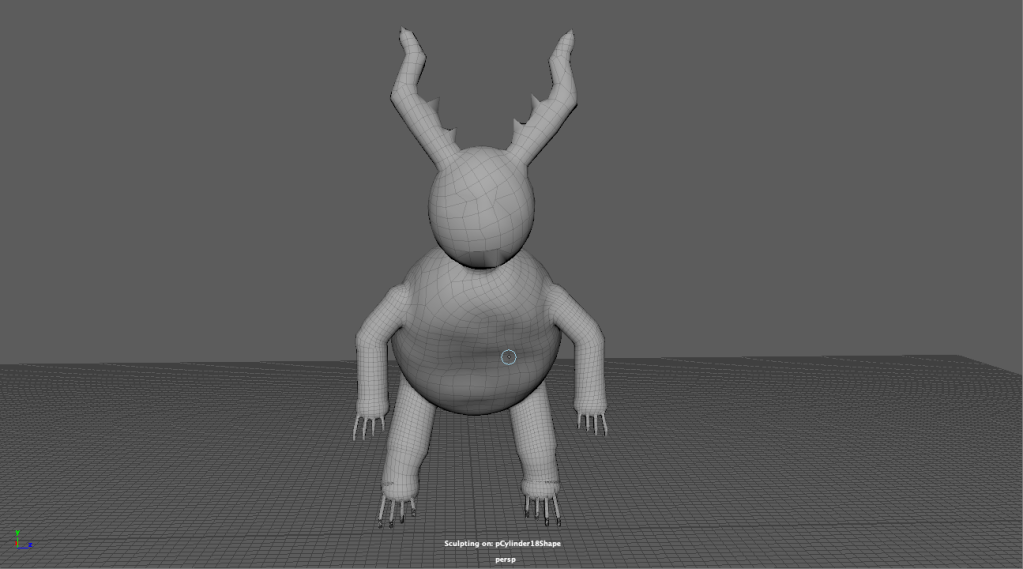
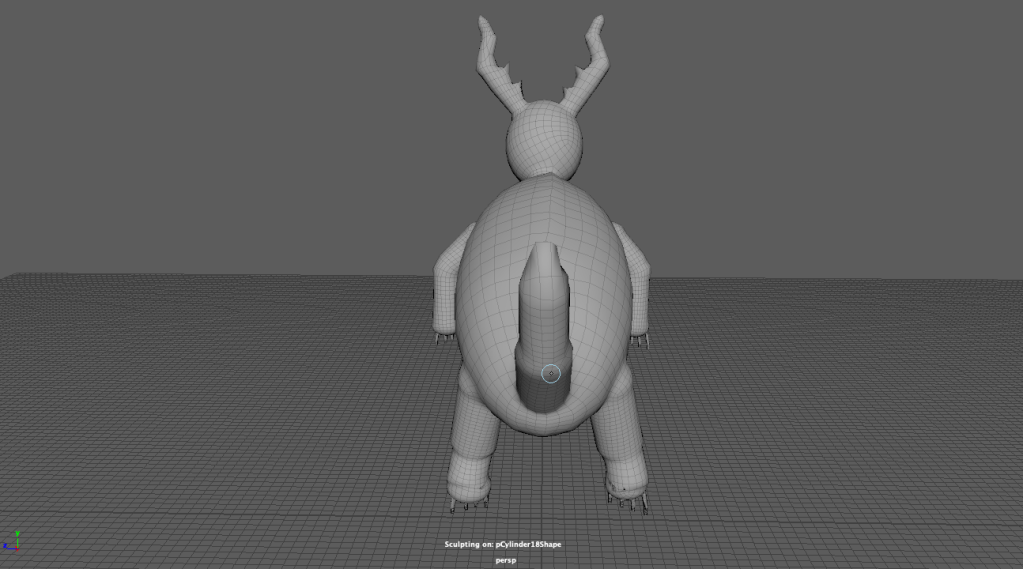
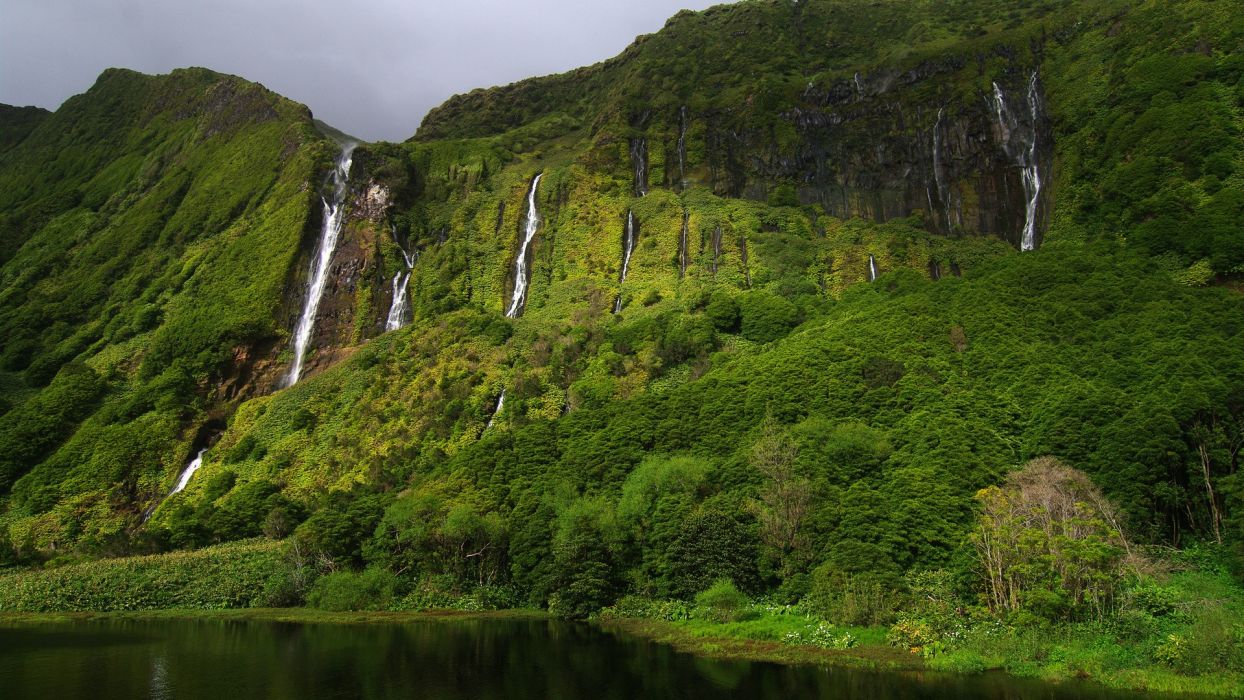
Some extra information to include are images of the habitat and the skin/skin texture of this creature.
As I have been observing humans, animals, nature and the world around me to inspire creation of a new character/creature, I was inspired by three different animals. These animals I started researching and observing really came together and formed an image in my head of what design outcome I wanted for my creature.
The first animal I started looking into, was the Pangolin. The Pangolin was an interesting creature to look at and research into, one cool thing I will point out is that it is the only mammal to wholly covered in scales which is it’s tough protection against predators.
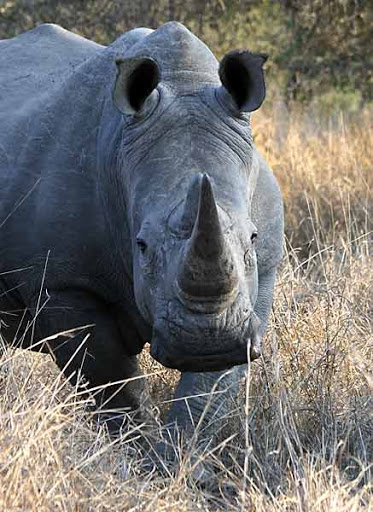
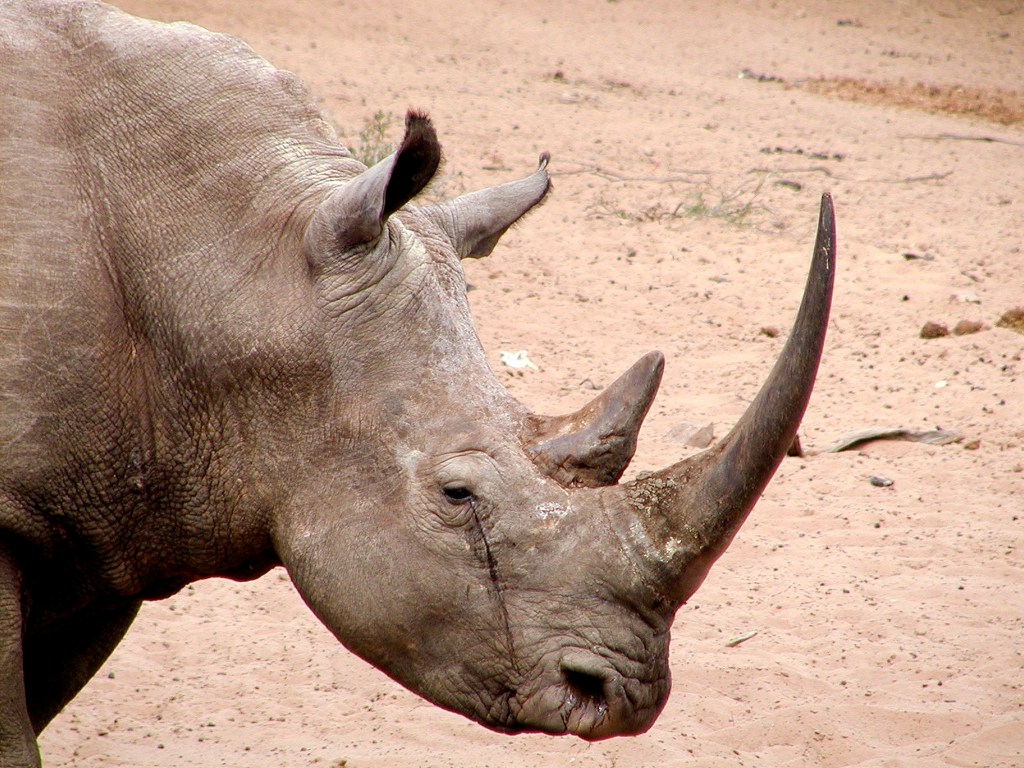
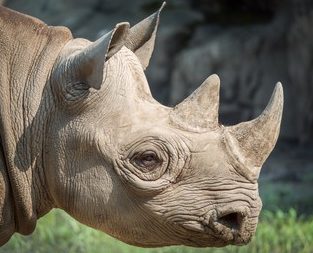
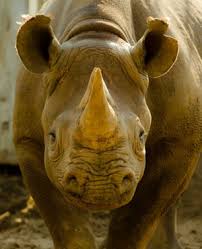
Secondly, a Rhinoceros took my interest. More so the head of the Rhino, I thought about a cross between the two animals. The Rhinoceros head on the Pangolin body is a good balance, obviously the pangolin body would have to much larger to harness the head of a Rhino
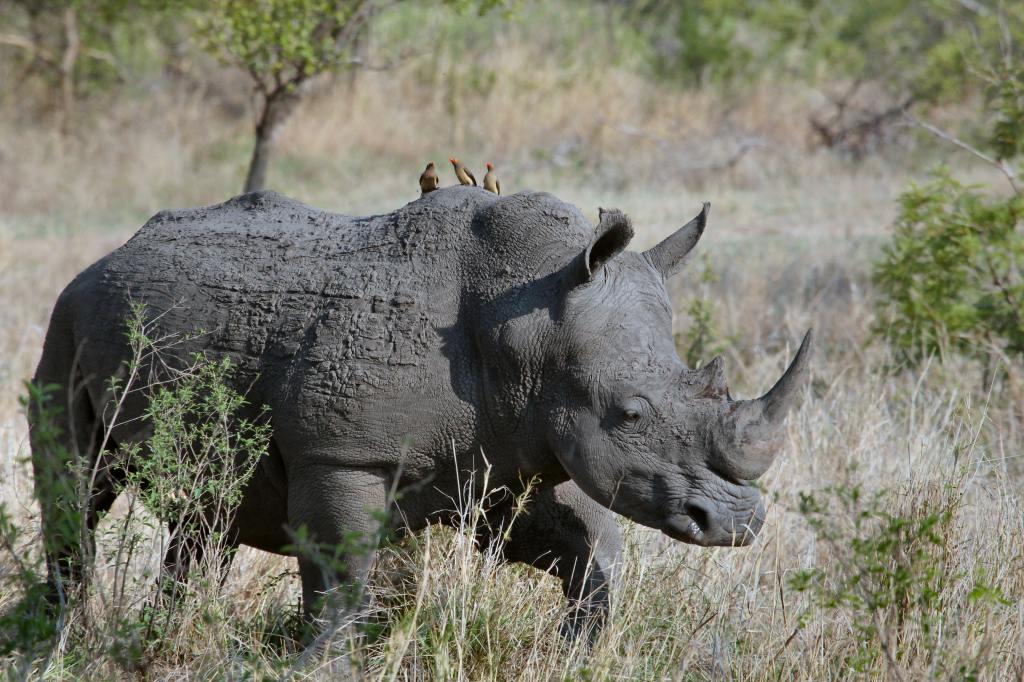
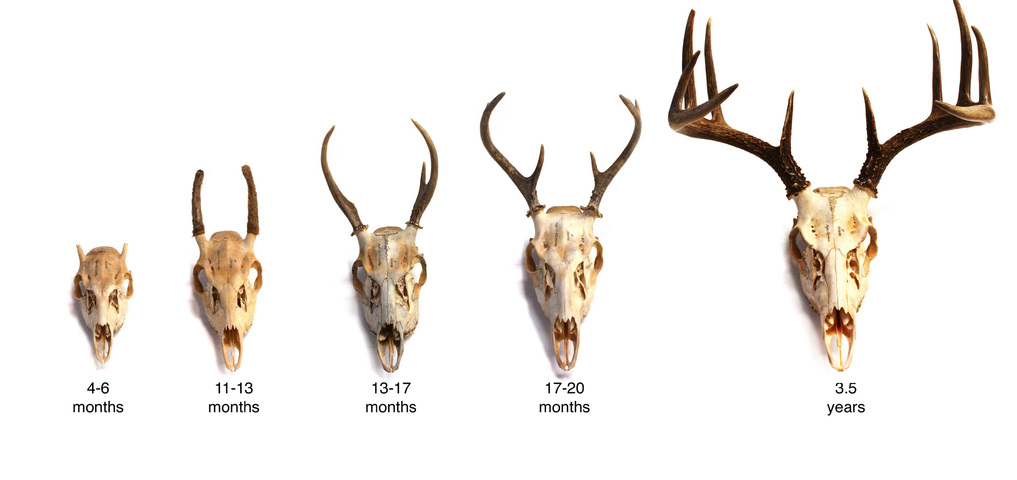
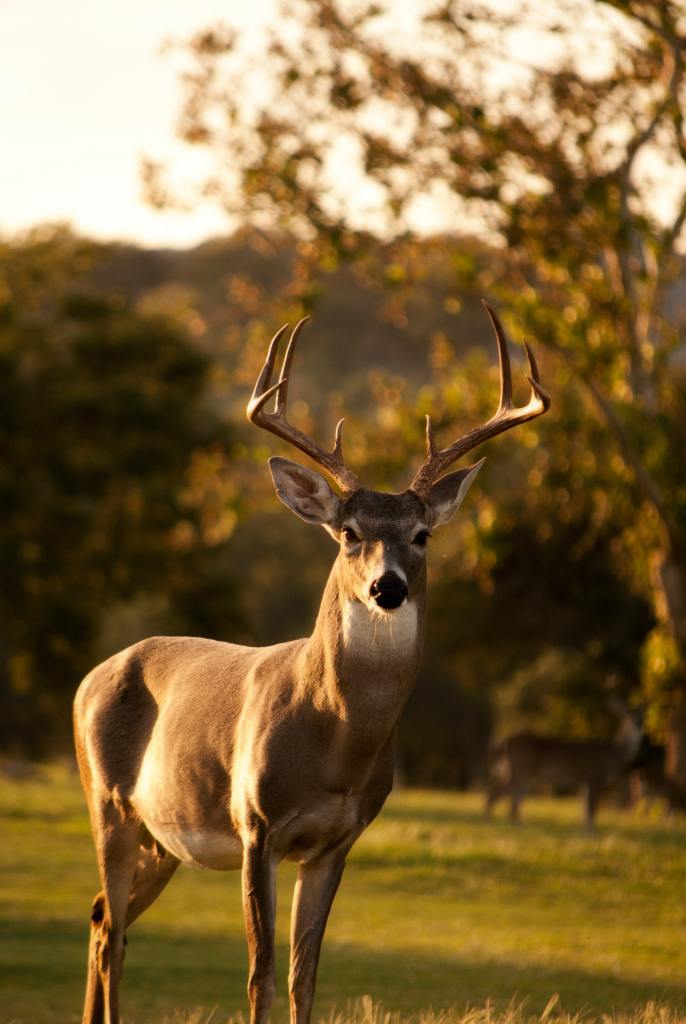
Thirdly looking at deers and specifically their antlers gave me the idea for my creature design, to introduce antlers on to the Rhinoceros. Doing this I decided that including the front horn on the Rhino’s nose would be too much. It wouldn’t help the flow of the creature design process.
So basically the creature I now have decided to put into the design process would involve would be a pangolin body, the head of a rhinoceros with the antlers of a deer.